Garden of the Gods Ultimate Hiking Guide
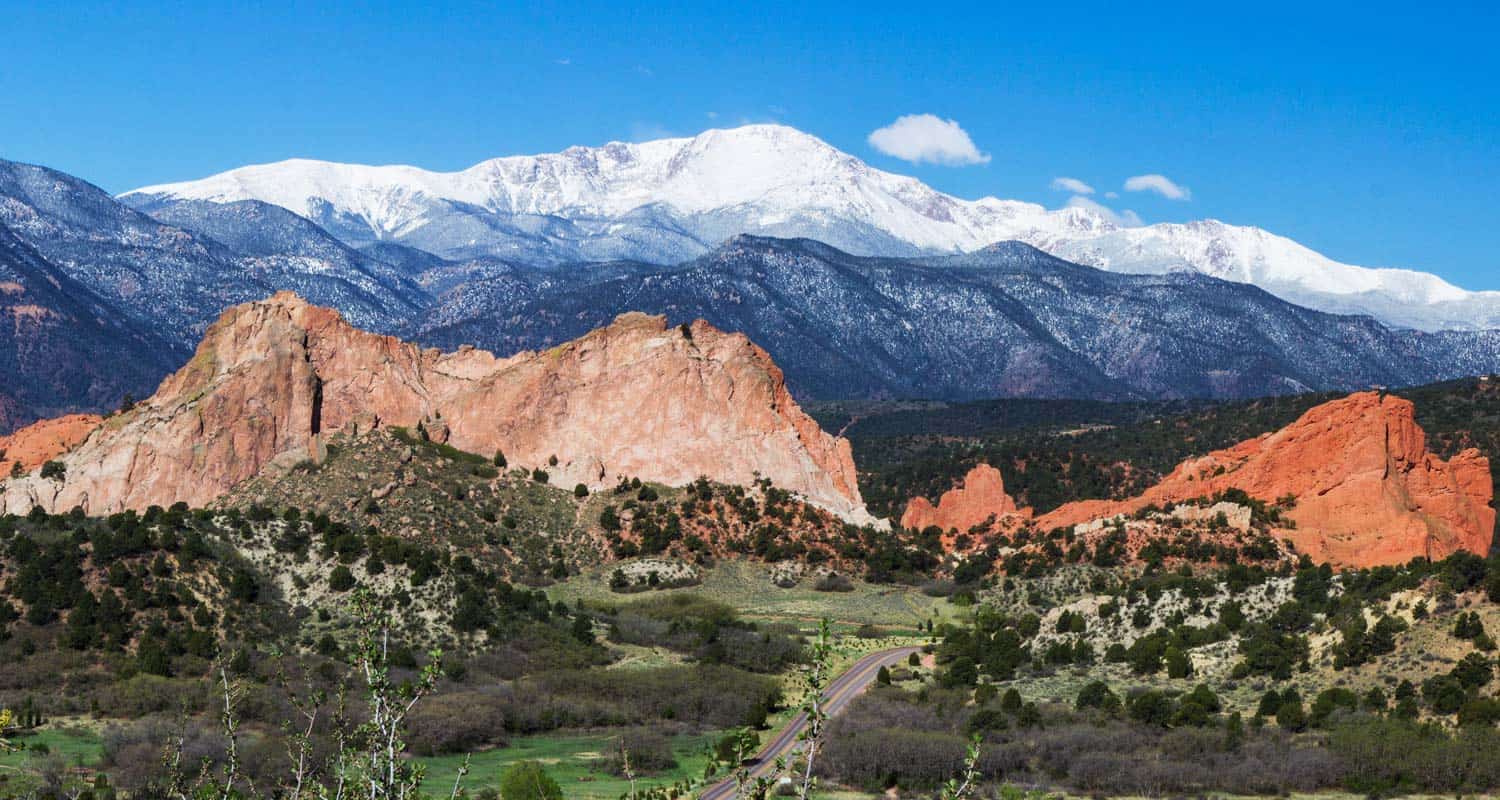
Garden of the Gods is argueabley the best place to hike in Colorado Springs. Designated a National Natural Landmark, the park is known for its towering red sandstone formations and panoramic views of Pikes Peak. Hiking, Horseback riding, mountain biking, birding, and climbing are among the activities that can be enjoyed here. This guide to the Garden of the Gods features 6 different hiking trail options, spanning from easy to moderate and 1/2 mile to 2.5 mile hikes.
We've attempted to create the definitive guide to hiking in Garden of the Gods. In this guide, you'll find: Driving directions to Garden of the Gods, Trail Maps, Photography tips, Camping information for the Garden of the Gods area, and other Resources for planning your Colorado Vacation. This guide to Garden of the Gods is extensive, so we have created a table of contents to help you navigate. Have fun exploring!
Garden of the Gods Hiking Guide Contents
- Trail Snapshot
- Driving Directions
- Hiking Trails
- Central Garden Trail
- Ridge Trail
- Siamese Twins Trail
- Palmer Trail
- Scotsman & Buckskin Charlie Loops
- Balanced Rock Trail
- Photography
- Hiking with Kids
- For Out-of-State Hikers
- Things to Do Nearby
- History and Geology
- Protect Garden of the Gods
Trail Snapshot: Garden of the Gods
| Hike Distance | Six Trails: 1/2 to 3 miles Round Trip - Depending on Trail |
|---|---|
| Difficulty | Easy to Moderate |
| Trail Type | Both Loop and Out-and-Back Hikes |
| Starting Elevation | 6200′ |
| Elevation Gain | Up to +300' |
| Seasons | Year Round |
| Hours | 5AM to 9PM |
| Cost | Free to the Public |
| Dogs | Allowed On 6' Leash |
| Hike Trail Map | Click for a Map of Garden of the Gods Area Hikes |
| Denver Drive Time | 1 hr 10min |
| Driving Directions | Click for Driving Directions to Garden of the Gods |
| Town Nearest Hike | Colorado Springs, Colorado |
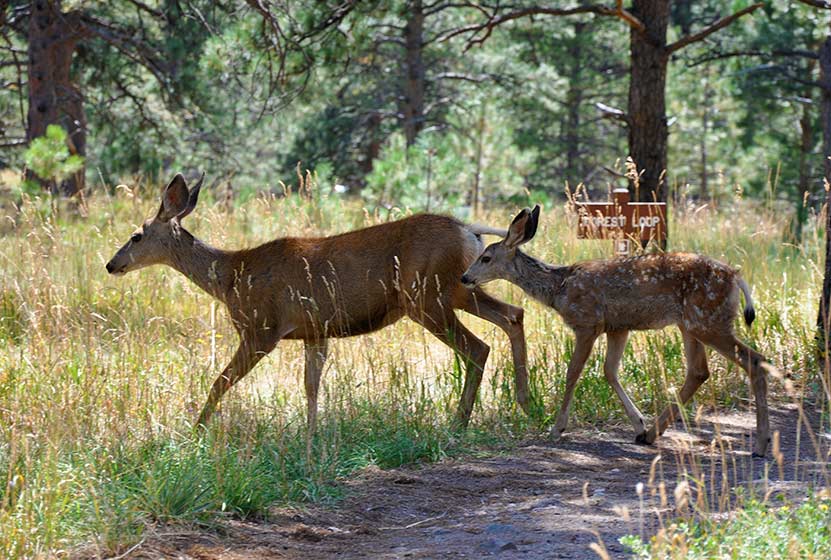
| Beauty | Red Rocks, Views of Pikes Peak, Wildflowers, Meadows, Aspens, Wildlife: Mule Deer, Whitetail Deer, and Bighorn Sheep. |
| Activities | Hiking, Biking, Running, Horseback Riding, Rock Climbing (in approved areas with permit), Camping, Visitor & Nature Center, Free Guided Nature Walk, Geo-Trekker Movie, Outdoor Scavenger Hunt. |
Driving Directions to Garden of the Gods
Take interstate I-25 to Colorado Springs. Exit onto West Fillmore Road and head West. Fillmore will change names to Fontmore Road. Take a right onto North 30th Street, and you'll find the Garden of the Gods Visitor Center just 1.2 miles up on the right/east side of the road. We recommend you stop at the Visitor Center to pick up a free color trail map. The main parking area for hiking is located on the North end of the park. You'll find Gateway Road (the access road into Garden of the Gods) directly across from the Visitor Center. Head west on Gateway road, then right at the intersection with Juniper Way Loop Road. The main parking area is located on the left-hand/South side of the first bend of the Juniper Way Loop. There are restroom facilities available at both the main parking area and at the visitor center.
- Driving Directions to the Main Parking Area at Garden of the Gods
- Driving Directions to Garden of the Gods Visitor and Nature Center
- Driving Directions to the Trading Post at Garden of the Gods
Before you park, consider driving around the entire Juniper Way loop to take in the sites and get your bearings. It's one of the most beautiful drives in Colorado, especially during sunrise and sunset. The loop is one way, has a low speed limit, and is frequented by cyclists. So, it also makes for a great bike ride-- the northbound loop is a gradual but demanding climb. Be attentive to hikers and cyclists as you drive in the park.
6 Hiking Trails at Garden of the Gods
Trail Option #1 - The Central Garden Trails
| Hike Distance | 1 Mile Round Trip |
|---|---|
| Difficulty | Easy |
| Trail Type | Lollipop Loop |
| Elevation Gain | Approx. +30' |
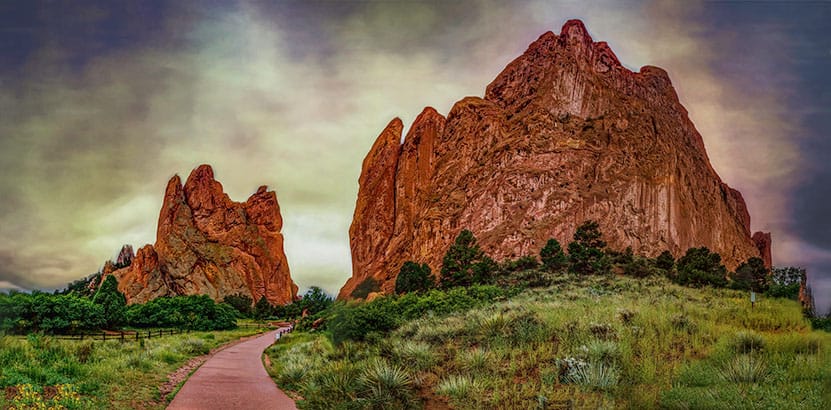
We've put this loop hike first on our list because it takes you right into the heart of the park. It's also paved and wheelchair and stroller accessible. From the parking lot, hikers will head south on the main trail (pictured above). On your right will be the largest of the sandstone Monoliths, North Gateway Rock. The tower on its north end is called the Tower of Babel, and its south end marks the gateway into the famous central valley. But before you enter the valley, be sure to look up at the Kissing Camels formation located at the middle-top of North Gateway Rock.
The loop begins right after you enter through the gateway at the twin spires of Sentinel Rock. Going left will take you on a clockwise circuit around the valley. You'll first pass between the Three Graces and Pulpit Rock before the trail bends to the North. Finally, the trail will bend South and meet back up with the trail that leads back to the main parking lot. There are many other trails that come off of the main loop trail, so bring a map with you if you plan to explore some of the nooks and crannies of the park.

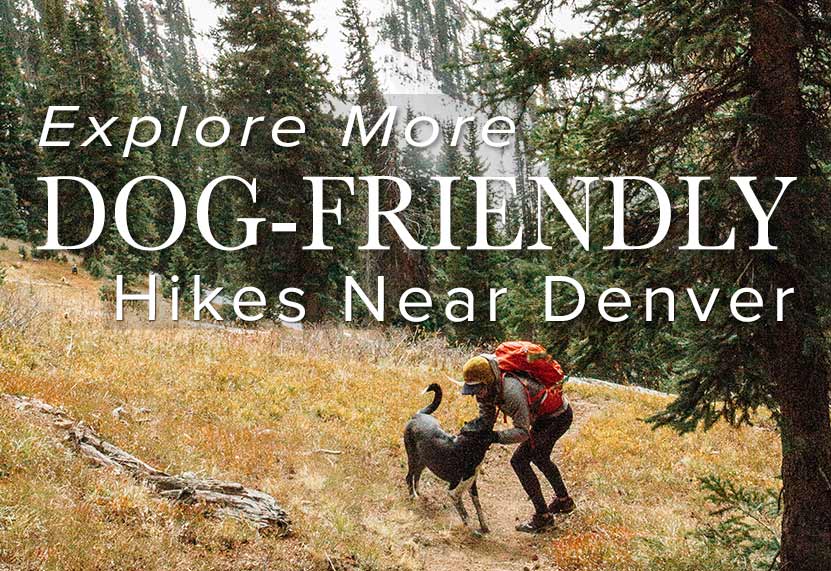
Looking for more places to hike with your dog? Explore more Dog-Friendly hikes near Denver by visiting our 25+ Dog Friendly Hikes and our Top 10 Dog Hikes Near Denver.
Trail Option #2 - The Ridge Trail at Garden of the Gods
| Hike Distance | 0.5 Mile Round Trip |
|---|---|
| Difficulty | Easy |
| Trail Type | Loop |
| Elevation Gain | Approx. +100' | Ridge Trailhead Driving Directions | Click for Directions to South Garden Parking Area |
The Ridge Trail is a short, half-mile loop on the southeastern end of the park. From the parking area indicated in the table above, the trail is located across the street to the left by takign a crosswalk. Before you cross, be aware of cars and cyclists (often the cyclists come around the curves of the park much faster and can take you by surprise). The Ridge trail makes it way to the foot of The Sleeping Giant formation before bending back toward the parking area.

Siamese Twins Rock Formation - Courtesy of Matt Santamarco
Trail Option #3 - The Siamese Twins Trail
| Hike Distance | Approx 1/2 Mile |
|---|---|
| Difficulty | Easy |
| Trail Type | Loop |
| Elevation Gain | Approx. +150' |
| Trailhead Driving Directions | Click for Directions to Siamese Twins Trailhead |
To hike to the Siamese Twins formation, take the trail on the north end of the parking lot that leads North. As you hike, you'll observe a very different landscape to the West, desert terrain that stretches out and up to Rampart Range Road. At the Siamese Twins, be sure to grab a photo of Pikes Peak framed by the window in the rock. Be sure to adjust your camera to take it's light reading from the distant mountain rather than the foreground (on your phone, simply press your screen to readjust the reference point for the lighting and focus). The trail heads South and will pass the parking area as it bends around and back up to it.
Trail Option #4 - The Palmer Trail (Chambers/Bretag Loop)
| Hike Distance | 2.5 as Described Miles |
|---|---|
| Difficulty | Moderate |
| Trail Type | Loop |
| Elevation Gain | Approx. +250' |
| Trailhead Driving Directions | Click for Directions to Main Parking Lot Trailhead |
This 2.5 mile loop hike is a great way to take in the full spectrum of terrain and rock formations in the park. The route, as describe below is about 2.5 miles, and mileage may vary depending on the side trails you decide to take. From the main parking area/trailhead, the Palmer Trail can be picked up by crossing Juniper Way directly North of the lot. Heading left/West on the Palmer trail, it will wind around South, roughly following the main road through Garden of the Gods.
To make the loop, at about 1.3 miles on the Palmer Trail hikers will cross Juniper Way at the Scotsman Picnic Area and join up with the Scotsman Trail. It will dips South initally, then heads Northeast to meet up with the trails of the Central Valley. This area can be quite a labyrinth and the best way to pick up the Eastern side of the loop will be to keep an eye out for the gateway, the space between North Gateway and South Gateway Rocks. Once through the gateway, hikers will pick up the Garden Trail, head East, and join up with the Susan G. Bretag Trail, by crossing Juniper Way where it intersects with Gateway Road. Heading North on the Bretage Trail, it will eventually come to a fork. Taking the left-hand/West trail (Palmer Trail) will lead back to the parking lot.
Trail Option #5 - The Scotsman and Buckskin Charlie Loops
| Hike Distance | Scottsman Loop Approx. 1 Mile; Scotsman+Buckskin Charlie Approx. 2 Miles |
|---|---|
| Difficulty | Moderate |
| Trail Type | Loop |
| Trailhead Driving Directions | Driving Directions to the Scotsman/Buckskin Charlie Trailhead |
These are two loops found just South of the Central Valley area. The parking area is small and will likely be full during most days during the Summer months. One alternative is to begin your hike at the main lot, then pick up the Scotsman trail on the South end of the Valley.
The Scotsman Loop is 1.1 mile in its entirety. Picking up the trail from the Scotsman Picnic ground by following social trails East, the Scotsman dips South then winds Northeast before making a sharp turn South and back to the parking area. Bring your trail map, or have it up on your phone to keep oriented.
The Buckskin Charlie Trail can be added to double your hike. Hikers will pick up the Buckskin Charlie Trail on the southern bends of the Scotsman. The trail winds around until it begins again to head North, following the line of the main road, Juniper way, until it joins back up with the Scotsman and returns home to the Scotsman Picnic area.

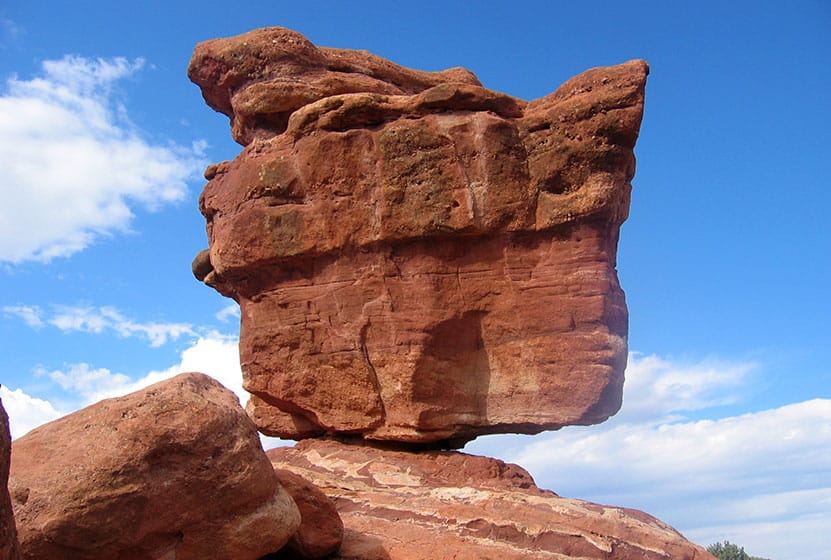
Trail Option #6 - The Balanced Rock Loop Hike
| Hike Distance | 0.7 Mile |
|---|---|
| Difficulty | Easy |
| Trail Type | Loop |
| Trailhead Driving Directions | Best Trailhead for Balanced Rock Loop Best Parking for Viewing Balanced Rock |
You don't have to hike to Balanced Rock (see driving directions in the table above). In fact, this loop hike is named "the Balanced Rock Trail" only because it is near Balanced Rock, not because it takes you there. For visitors entering through the South end of the park, Balanced Rock will be the first stop, then on to the Trading Post. In fact, the best way to pick up the Balanced Rock Trail is from the Northern end of the Trading Post lot. Hikers will find a connector trail that goes directly from the lot North, crosses the road, and immediately picks up the Balanced Rock Loop trail. Hiking counter-clockwise, the trail follows alongside Garden road, then leads North until it terminates at another section of the road. Hikers can cross the road (watch for cars and cyclists) and pick up the Cabin Canyon Trail across the street. Taking the Cabin Canyon Trail South, it will come to a crosswalk where you can pick the Balanced Rock Trail up again and back to the parking area.
Photography: Great Photos in Garden of the Gods
- All year round and any time of the day, Garden of the Gods is already photogenic. However, the best times to take photos are during the golden hours of sunrise and sunset when the rock faces are lit up and cast their shadows across the landscape. Going early in the morning will also help you avoid having people in your photos.
- Snow adds its white contrast during the Winter months and early Spring. If you want a snowcapped Pikes Peak in the background, you'll likely need to get that shot before mid-June.
- Wildflowers appear most noticeably in April through July.
- After heavy rains, standing water can form what look like small ponds (but are really giant puddles). These offer the rare opportunity to capture the reflection of the rock formations on water.
- One classic vantage point is to take your photo from the North End of the Palmer Trail at Sunset. This will give you one of the best photographs of the Central Valley area.
- For sunrise, a great place to capture Garden of the Gods with Pikes Peak in the background is from the parking area up on Mesa Road that overlooks the park.
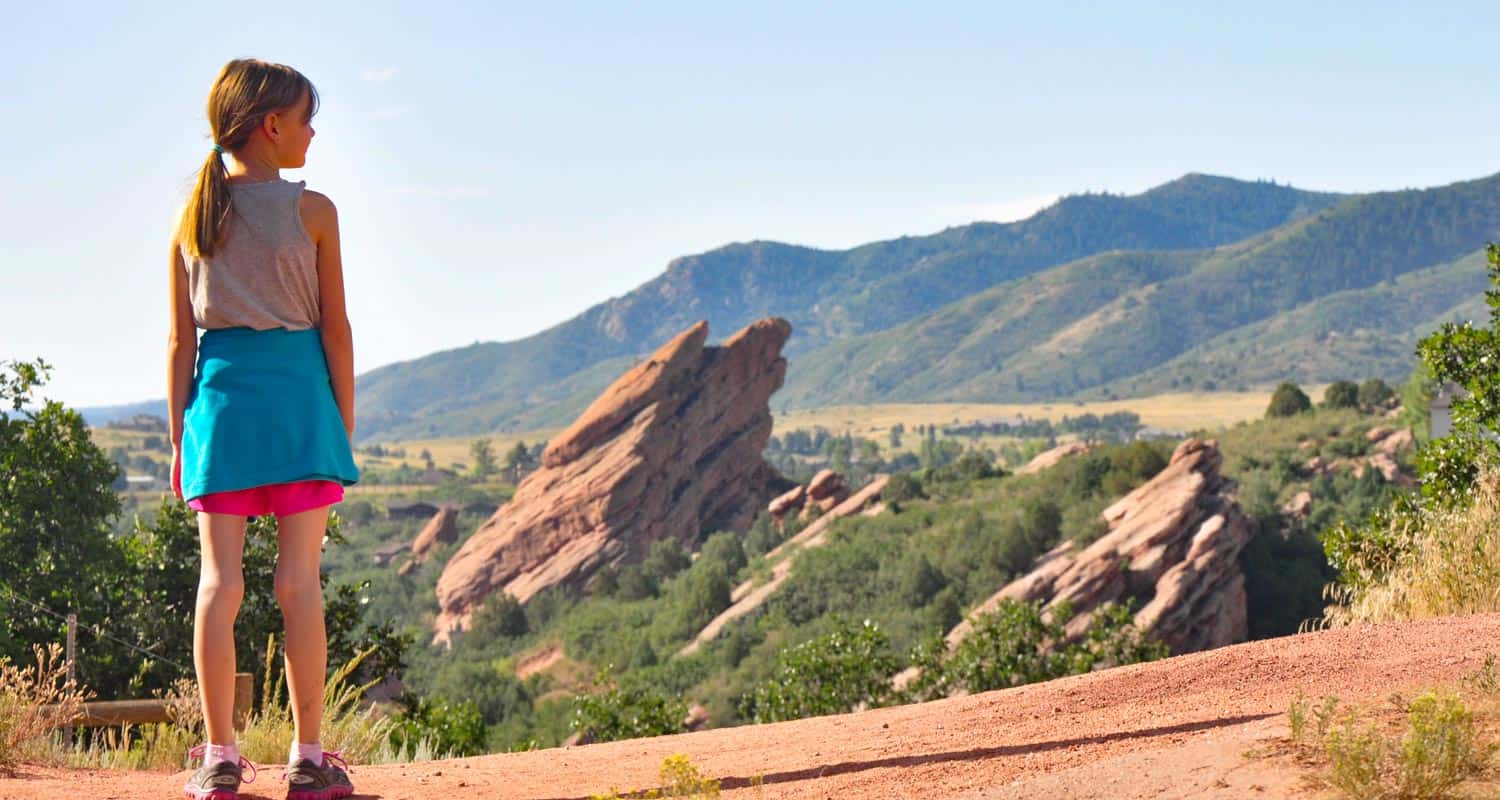
Hiking with Kids at Garden of the Gods
- Hydrate: This goes for adults as well, but is even more important with kiddos. Almost all the trails in Garden of the Gods are exposed to the sun. You're also in a High-Plains Desert environment, so you simply need more water. Then add onto that physical exertion. So, bring water and hydrate.
- Pack Snacks or Bring a Lunch: Even though the hikes are not long in Garden of the Gods, it always helps to have fuel. Plus, nothing beats finding a great view of Pikes Peak and kicking back to rest and enjoy a picnic.
- Climbing can result in injury: Having hiked often in Garden of the Gods, I've witnessed people--usually young people--who have climbed up into areas and gotten themselves in a tough spot. Children should know that climbing up into an area is a lot easier than getting down.
Visiting Garden of the Gods From Out-of-State
- Download our Hiking Guide for a list of hiking tips, 10 essentials that everyone should pack for their dayhike, and recommended hiking snacks.
- Free Full-Color Map: Don't get lost. Pick up this freebie at the Garden of the Gods Visitor & Nature Center information kiosk.
- Bring Lots of Water: It can be very hot and dry, and there may not be a chance to refill, so bring a full water bottle.
- Altitude: If you are visiting Colorado from out-of-state, chances ar that it will take you a few days to adjust to teh altitude. The good news about hikes in Garden of the Gods is that they are relatively easy. However, a little exertion at altitude can result in feeling naseauted, winded, and just plain tired. So, don't overdo it if you are not feeling well. Hydrate, Hydrate, Hydrate (because it oxygenates your blood), and get good rest.
- Garden of the Gods Visitor CenterThe Visitor Center is a must-do, especially if you are visiting from out-of-state. They now have a cafe with a family-friendly and healthy menu.
- Free Guided Nature Walks led by a naturalist, from the north parking lot
- Geo-Trekker Movie Experience at the Geo-Trekker Theater in the Visitor Center.
- Outdoor Scavenger Hunt with a guide that will be provided
- Park Tours on Bus, Jeep, or Segway
- Garden of the Gods Trading Post: This gift shop and art gallery is located at the southwest edge of the park.
- Breakfast and Lunch: A favorite local go-to is the Mountain Shadows Cafe--a great place to refuel after your hike.
- Mediterranean Food: A great mediterranean option is the nearby Heart of Jerusalem Cafe.
- Amazing Sandwiches: You've got to be patient for this one, because, at the Mate Factor, they take their time crafting your sandwich--but it's worth it. Step inside and you'll agree that you've never been to a place like this before. Mate Factor, Manitou Springs.
- Stay the Trail: The sandstone in the parks is easily eroded, and because this area sees a lot of visitors the impacts of individuals quickly adds up. So keep on established trails during your hikes.
- Keep Dogs on a 6' Leash: And be sure to bring bags for picking up after your pet.
- Pack Out All Trash: It should go without saying but be sure to pick up after yourself. In the last few years it seems that litter along trails in Colorado has grown to be a real problem. Do your part to keep the park and our State beautiful. One of our family hiking habits is to pick up trash as we hike.
- Climbing and Bouldering: Climbing and Bouldering in Garden of the Gods require both the proper equipment and permits. You can pick up permits at the Visitor Center or online at the City of Colorado Springs climbing permit page.
- Thanks goes out to Joel Tonyan for his great photo of Garden of the Gods and snow-dusted foothills.
- Care for the Rock: This should also go without saying, but don't carve or deface the rock in any way.
- Let them sit and grow: Removing rocks, plants, or animals is prohibited.
- Mountain Biking: Mountain biking is limited to designated trails.
Camping Near Garden of the Gods
Camping is prohibited in Garden of the Gods, and it's important to understand that the Park is located in the town of Colorado Springs--it's not a backcountry experience. Those looking to camp will need to explore campgrounds and tent camping options outside the immediate area. However, there is a nearby campground in Manitou Springs that offers cabins, bunkhouses, and RV spots. It's pet-friendly and even offers bike rentals. You can find current rates and more at Garden of the Gods RV Resort. Most of the tent camping is going to be out near Rampart Range Reservoir or further West past Woodland Park, CO.
Things to Do and Places to Eat Near Garden of the Gods
History and Geology of Colorado’s Garden of the Gods
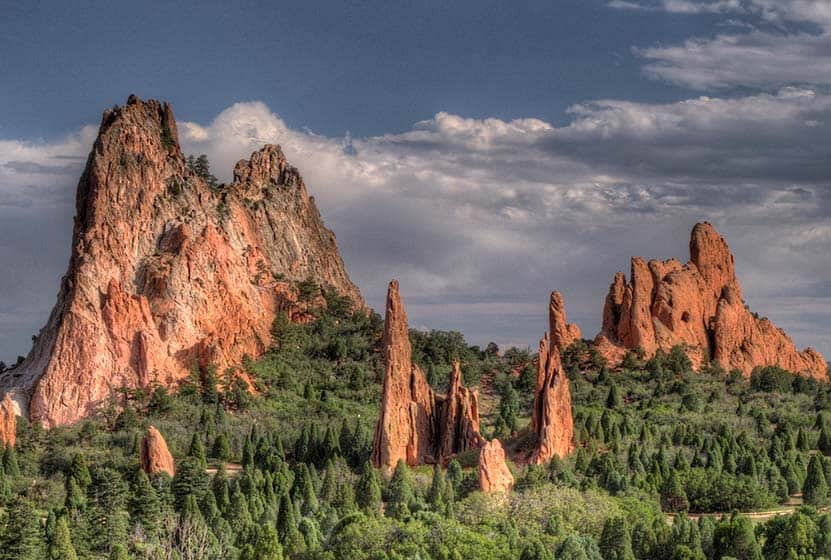
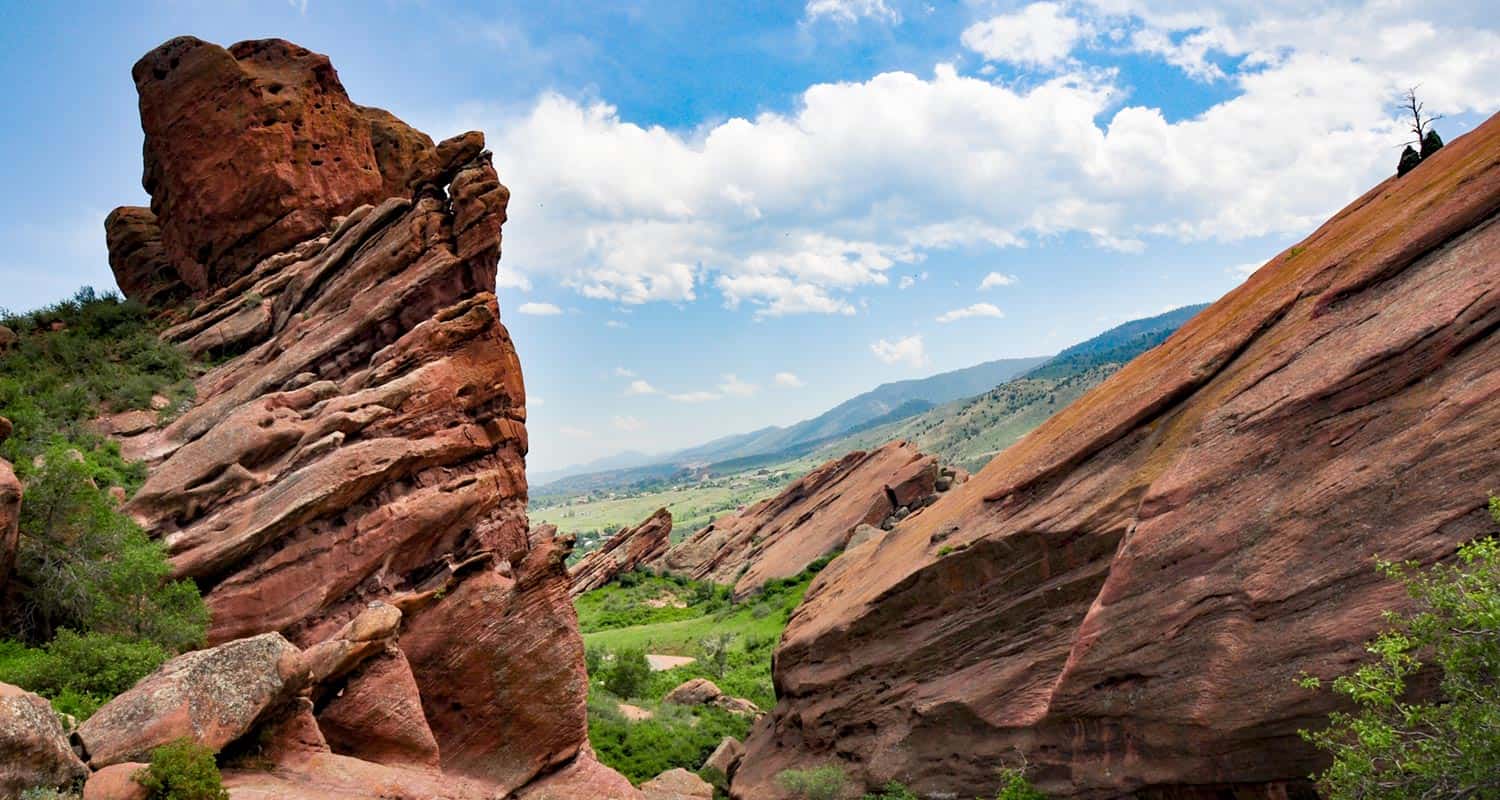
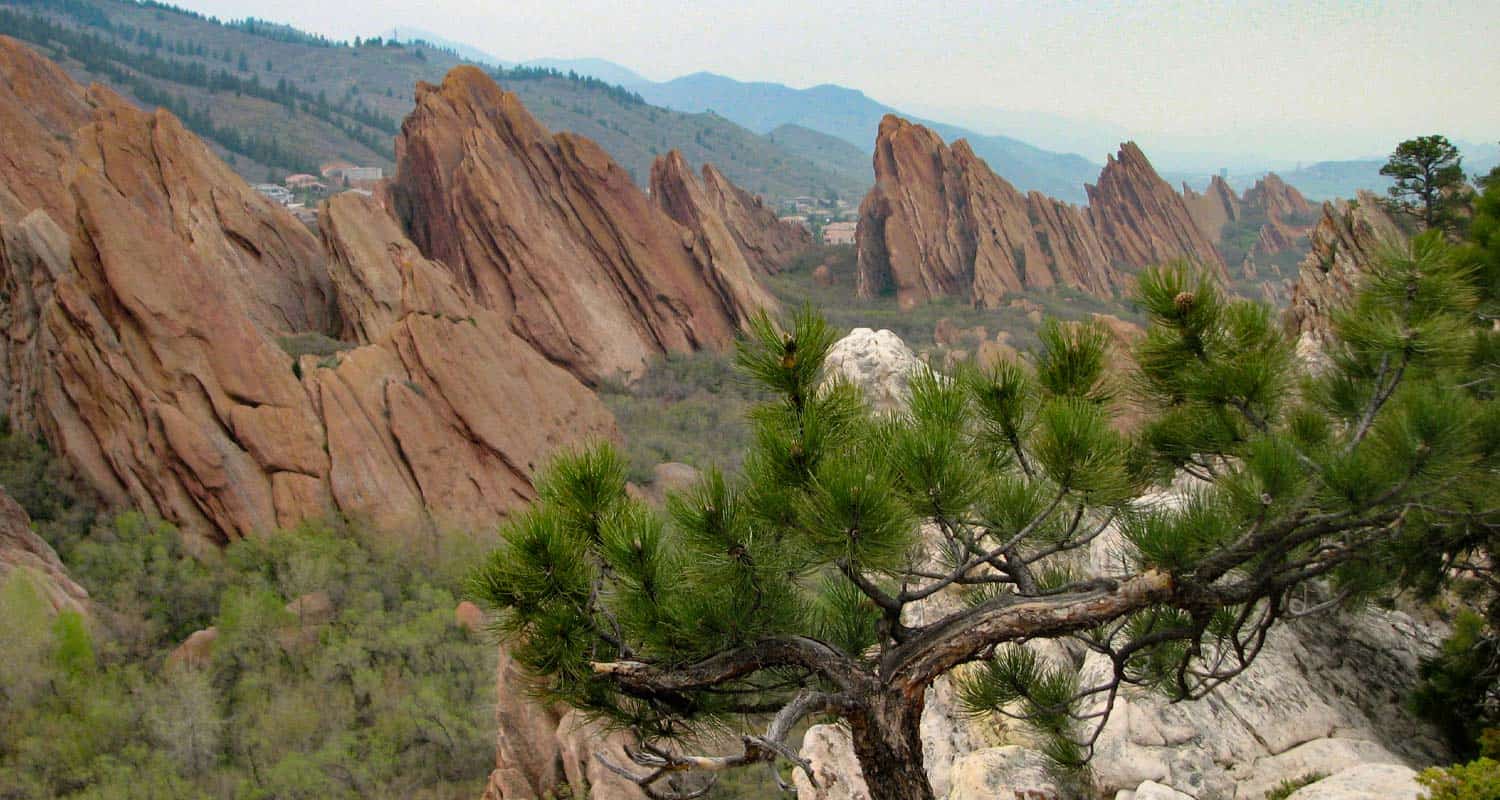
Imagine a prehistoric landscape of sand dunes plunged and crushed into the earth by some violent upheaval involving tectonic and hydraulic forces. That's how the red rock fins of Garden of the Gods were formed in the womb of the earth. Then another cataclysm. The Pikes Peak massif gets thrust to the sky along with the surrounding red sedimentary rock. Some at angles and some perpendicular to the land. Then the forces of wind and water began to wear down the loose rock creating the unusual holes and across the surfaces of the rocks. You'll find these types of rock formations stretching from North of Ft. Collins down into Southern Colorado. Some of the most notable are Roxborough State Park and South Valley Park near Littleton and Red Rocks Park in Denver.
After his death in 1907, the children of railroad tycoon, Charles Elliott Perkins, fulfilled their father's wishes by donating 480 acres of Garden of the Gods to become a permanent park and free to the public. The park has expanded over the years to over 1,300 acres. The park got its name from a German surveyor mapping out the land in 1859.
How You Can Protect the Garden of the Gods Area
Weather
Map & Driving Directions
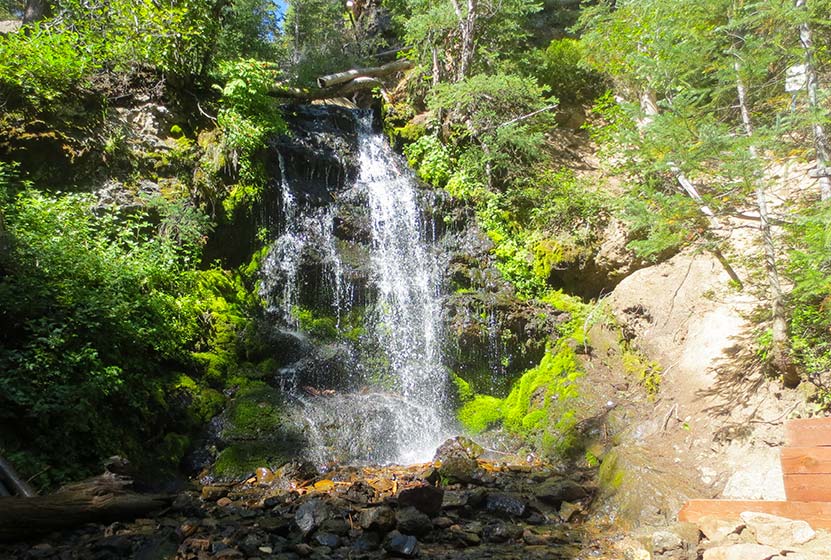
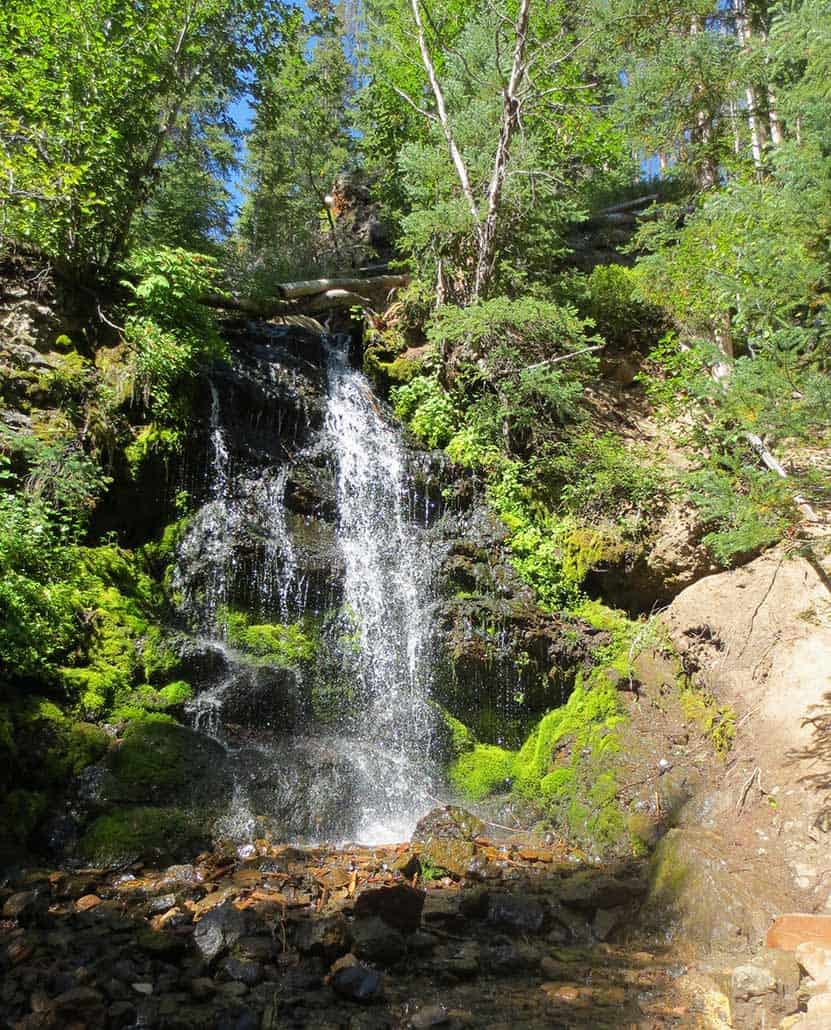
Pole Creek Falls Hike near Granby, Colorado
The Pole Creek Falls trail near Granby, Colorado is an easy out-and-back destination hike to a waterfall that courses down a huge dark slab of moss-covered rock. Purple mountain asters and active beaver dams can be observed along this family-friendly trail. Explore the full Pole Creek Falls hike profile below for trail map, driving directions, and more tips and details to help you enjoy this adventure near Granby.
Trail Snapshot: Pole Creek Falls Trail near Granby, Colorado
| Hike Distance | 2.2 miles Round Trip |
|---|---|
| Difficulty | Easy |
| Duration | Approx 1 Hour |
| Trail Type | Out and Back and Loop |
| Starting Elevation | 8925′ |
| Elevation Gain | Approx Total +400' on Loop |
| Seasons | Year Round |
| Dogs | Allowed On Leash |
| Hike Trail Map | Click for a Pole Creek Falls |
| Denver Drive Time | 1 Hour 50 Min |
| Driving Directions to Pole Creek Falls Trailhead | Click for Google Map |
| Town Nearest Hike | Frasier, Colorado |
| Beauty | creek, buckwheat, larkspur; wildlife: beaver, brook trout, moose, bear |
| Activities | Hiking, photography |
| Fee: | Free for YMCA of the Rockies Members and Paid Guests or Day-Pass purchase required (see details below) |
Parking, Trailhead, & Fee Information for Pole Creek Falls Hike
The trailhead for Pole Creek Falls is located on the YMCA Snow Mountain Ranch property just south of Granby, Colorado. To start out from Denver, take Interstate 70 to Highway 40. Highway 40 is a windy drive up and over Berthoud Pass, but the views make it worthwhile. You have the option of stopping at the top of Berthoud Pass to take in the alpine landscape. Then, stay on Hwy 40 through Winter Park, Fraser, and Tabernash. Turn left onto CR 53 (a sign for Snow Mountain Ranch will mark the road). As you drive into the property, look for the flagpole. This will mark your first stop, which is the Program office, the building immediately to the right of the flagpole/stone marquee entrance sign. This is where you'll need to purchase your day-pass (one for each person).
So, this is the real thing you have to consider for this hike: Is it worth the cost? The day-pass fees are $20 per adult and $10 per child 6-12. Kids 5 and under are free. The day-pass gets you access to all the hiking trails, biking trails, rec center, mini-golf, and swimming pool. However, if you're a guest at the ranch and paying for lodging, your day-use is included in the price.
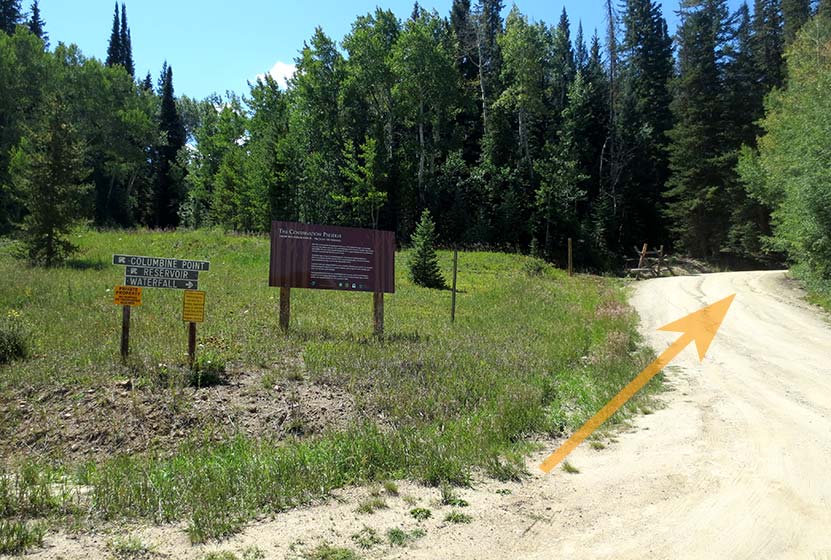
After getting your passes, drive back out and turn right onto CR 53. Stay on CR53 as it turns into a dirt road and passes the riding stables. Just after the stables it will bear left (you'll notice on the Google map that the road name at this point is CR53/Blue Ridge Rd). At the fork, there will be signage for the waterfall trailhead that points you to the right (see photo below).
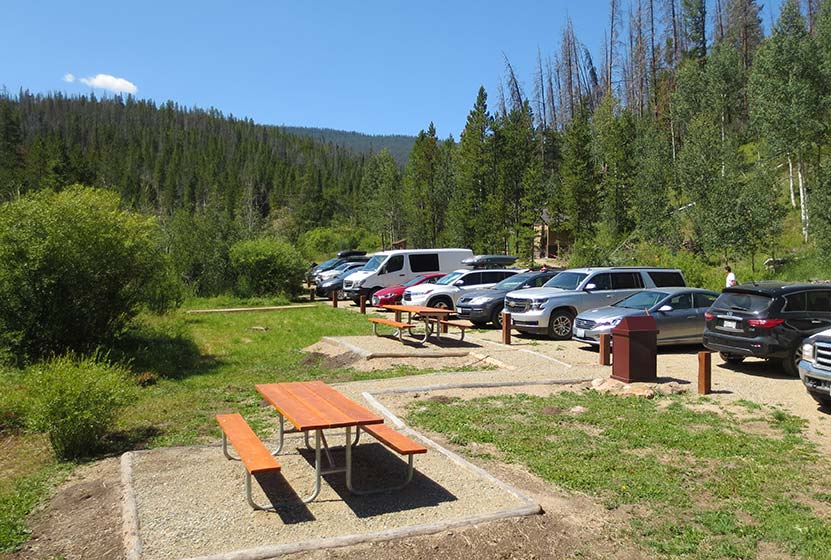
The trailhead parking is just a short distance further down the road from this fork. Here you'll find a toilet, picnic tables, and trash receptacles.
The trailhead is located at the end of the parking area on the right-hand side of the lot (pictured below).
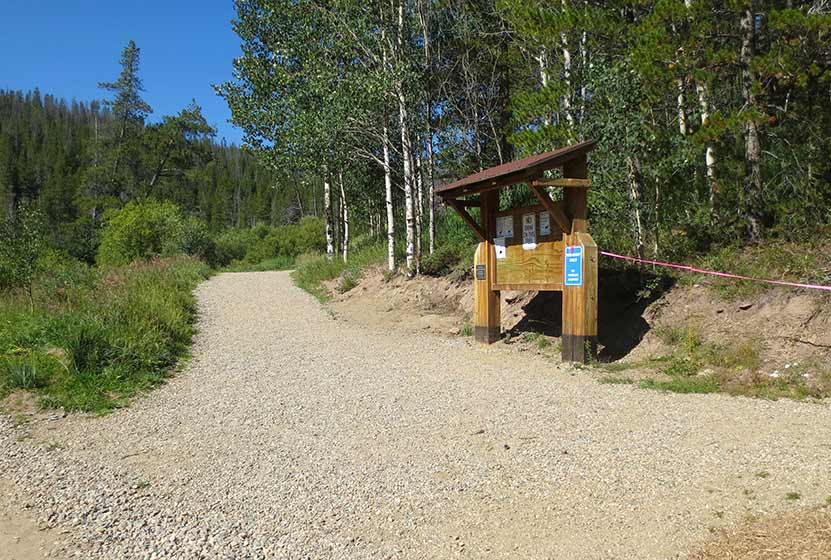
Pole Creek Falls Trailhead
The Hike: Pole Creek Falls Trail
My oldest daughter and I hiked to Pole Creek Falls in the middle of August, and the falls were still at a nice flow. I would think that the waterfall really gushes in the late-Spring and early-Summer. The trail was gradual and enjoyable all the way up to the falls. Early on the trail, hikers will encounter a fork with a small footbridge to the left (picture below). Here you'll want to bear right to keep on the main trail.

Eventually, the trail will enter a wooded area and cross over a couple footbridges as it follows Pole Creek up to the base of the waterfall.
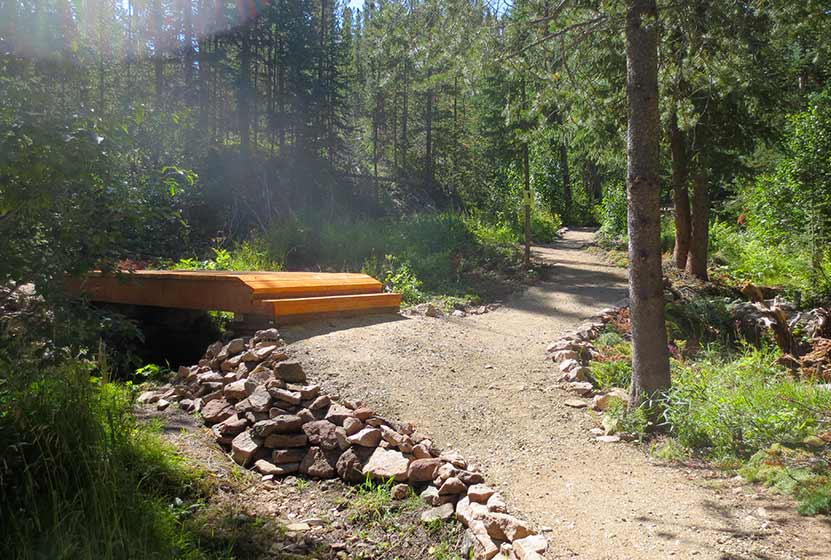
Finally, the bridge pictured above, hikers will stay on the right-hand trail segment to access the base of the falls. The trail to the left leads around to a higher viewing area, but the best views of the waterfall are at the bottom.
Tips & Resources for Hiking the Pole Creek Falls Trail
- TIP: After paying the daily access fee at the Program building in YMCA of the Rockies at Snow Mountain Ranch, obtain a map which leads to the trailhead along Blue Ridge Road, and marks the other trails on the property.
- TIP: Wear Sunscreen as much of this hike is without shade.
- Trail Map: Pole Creek Falls Trail near Granby
- Packing List: Always pack the 10 Essentials. Download our Hiking Guide to get the list and dayhiking packing checklist.
- Colorado Road Conditions: Colorado Road Conditions
- After the Hike: The Ditch in Winter Park
Weather
Map & Driving Directions
Click for Driving Directions
Meyers Homestead Hike in Walker Ranch
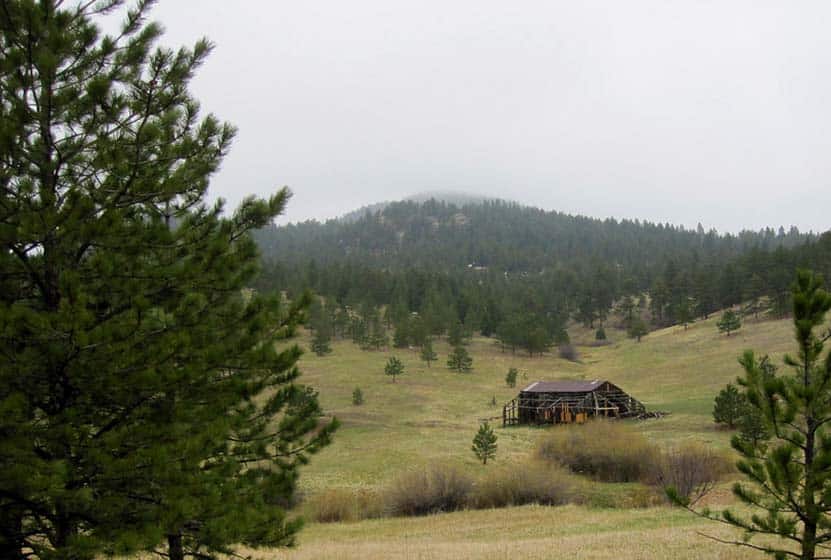
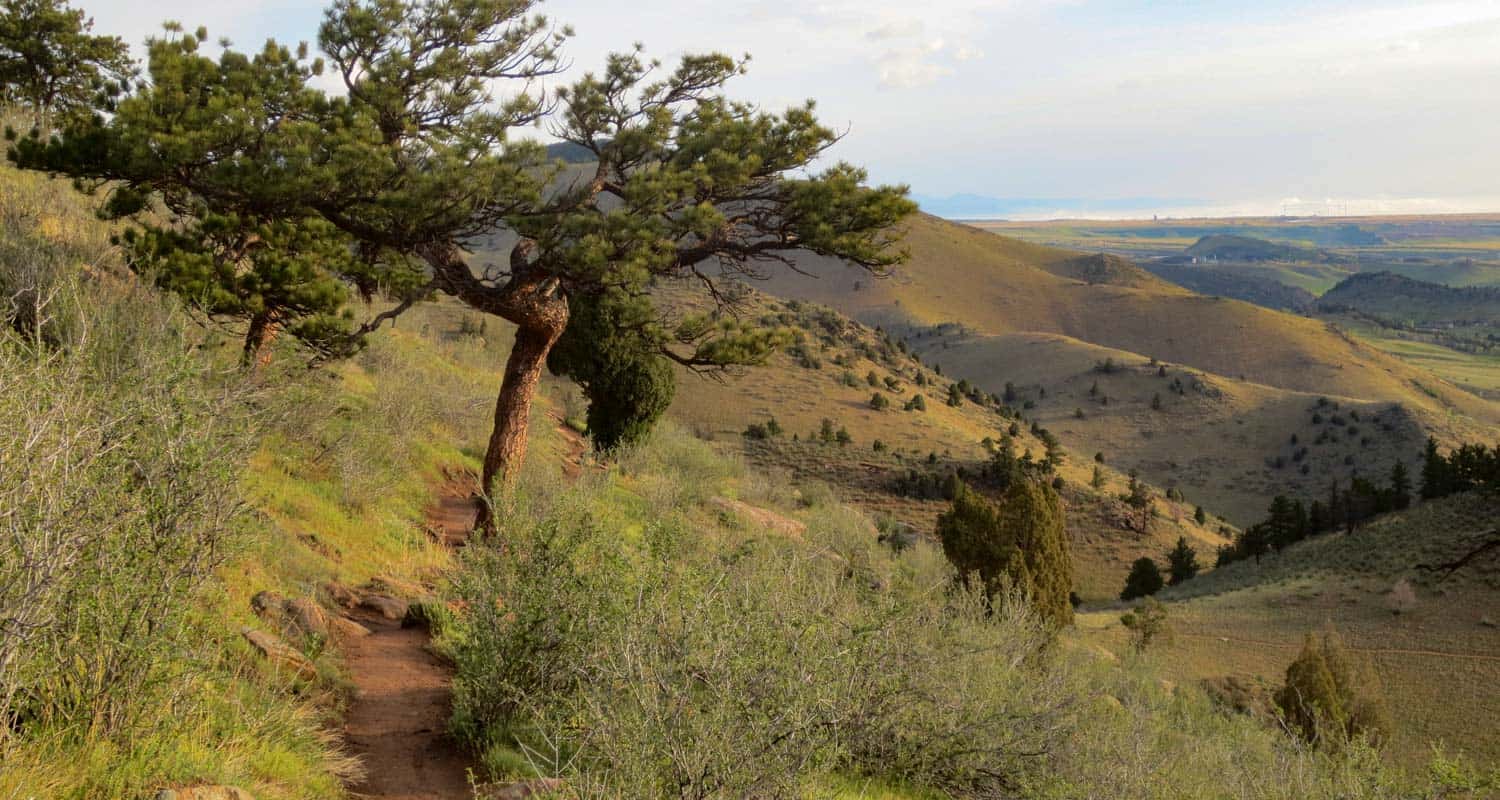
The Meyers Homestead Hike located in Walker Ranch is an almost perfect family hike near Boulder, Colorado. This 5.2-mile out-and-back hike travels through Meyers Gulch, past the remnants of a historic homestead, to an overlook offering panoramic views of Boulder Canyon and the snowcapped mountains of Indian Peaks. It's a wide trail through meadows, stands of aspen, and punctuated by ponderosa pine and wildflowers. Explore the full Meyers Homestead hike profile below for trail map, driving directions, and more tips and details to help you enjoy this trail near Boulder.
Trail Snapshot: Meyer Homestead Hike Near Boulder
| Hike Distance | 5.2 miles Round Trip |
|---|---|
| Difficulty | Easy to Moderate |
| Duration | Approx 3 hrs |
| Trail Type | Out and Back |
| Starting Elevation | 7500′ |
| Elevation Gain | Approx +750′ |
| Seasons | Year Round |
| Dogs | Allowed On Leash |
| Hike Trail Map | Click for a Map of Meyers Homestead Trail in Walker Ranch |
| Denver Drive Time | 1 hr |
| Driving Directions to Meyer Homestead Trailhead | Click for Google Map |
| Town Nearest Hike | Boulder, Colorado |
| Beauty | Meadows, historic homestead, wildflowers, peak views, aspen, ponderosa |
| Activities | Hiking, Walker Ranch homestead tours, horseback riding, mountain biking (double-track most sections), trail running, snowshoeing, photography |
Parking & Trailhead Information for Meyers Homestead Trail
The drive to Meyers Homestead Trailhead starts on the Baseline Road in Boulder. Traveling West past Chautauqua Park, the road will turn into Flagstaff Road at the base of Flagstaff Mountain and begin a windy and steep ascent. The overall trip on Flagstaff Road to the trailhead is about 6.2 miles. The Myers Homestead Trailhead is located on the right (West) side of the road. Restrooms, picnic area, and interpretive signs are available at the trailhead.
The Hike: Meyers Homestead Trail
The hike starts from the Meyers Homestead Trailhead by taking the trail on the right marked with a sign that reads "Meyers Homestead Trail - 2.6 Miles One-Way." The initial trail segment descends into a broad meadow. Around just 1/4 mile into the trail, you'll spot the remnants of a sawmill, part of the original Meyer Homestead. There is a spur trail that leads to a mill. Once past the sawmill, the trail begins a very gradual ascent and follows a small seasonal creek into the Meyer Gulch.
Starting at around 1/2 mile in, the trail will begin to weave in and out of groves of aspens and ponderosa pine, providing intermittent shade on a hot summer day. The trail will eventually open to another large meadow before entering the final, wooded and steeper 1/2 mile. This segment of switchbacks leads to a small unnamed peak with a bench and overlook. Here, you can take in views of Sugarloaf Mountain, Indian Peaks, Longs Peak, and Boulder Canyon.
A great related hike is the Eldorado Falls hike that is also part of the Walker Ranch Trail system.
Tips & Resources for Hiking the Meyers Homestead Trail
- TIP: Pause to read thee interpretative signs along the trail to indicate places that have historical and ecological significance.
- Trail Map for Meyers Homestead Trail: Trail Map for Meyers Homestead Trail
- Packing List: Always pack the 10 Essentials. Download our Hiking Guide to get the list and dayhiking packing checklist.
- Colorado Road Conditions: Colorado Road Conditions
- Photo: We would like to express our gratitude to Ian W. Stearns for sharing such amazing photographs of this hike to Meyers Homestead.
- After the Hike: The Parkway Cafe
Weather
Map & Driving Directions
Click for Driving Directions
Hall Ranch Hike Near Lyons, Colorado
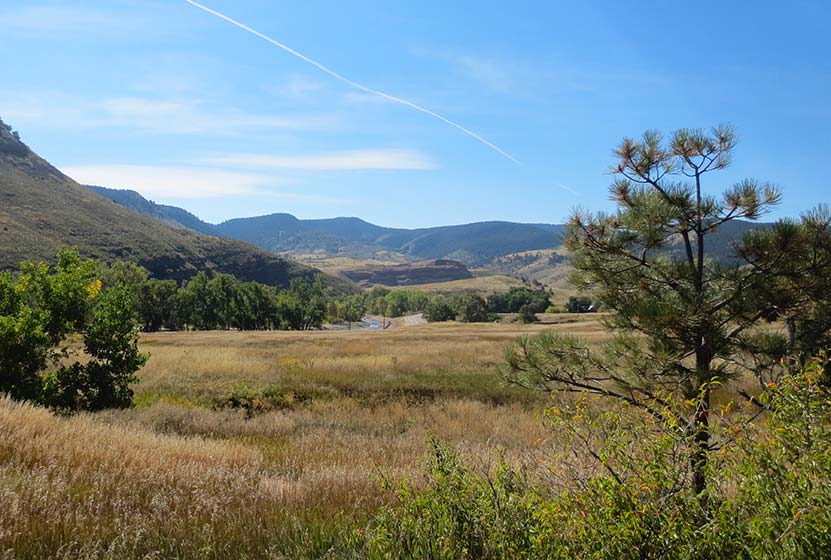
Hall Ranch, just outside of Lyons Colorado, is a hiking, mountain biking, trail running destination that features red sandstone buttes, vast green meadows, and panoramic views of white snowcapped meadows. Tucked into the foothills near the St. Vrain River, the trails at Hall Ranch are a great escape from life in the city. Explore the full Hall Ranch hike profile below for trail map, driving directions, and more tips and details to help you enjoy this adventure in the Boulder County.
Trail Snapshot: Hall Ranch Hike Near Lyons
| Hike Distance | 2 to 9.2 miles Round Trip |
|---|---|
| Difficulty | Easy to Moderate |
| Duration | Approx 5.5 hrs for Loop Hike |
| Trail Type | Out and Back and Loop |
| Starting Elevation | 5500′ |
| Elevation Gain | Approx Total +2479' on Loop |
| Seasons | Year Round |
| Dogs | Dogs are Prohibited in Hall Ranch |
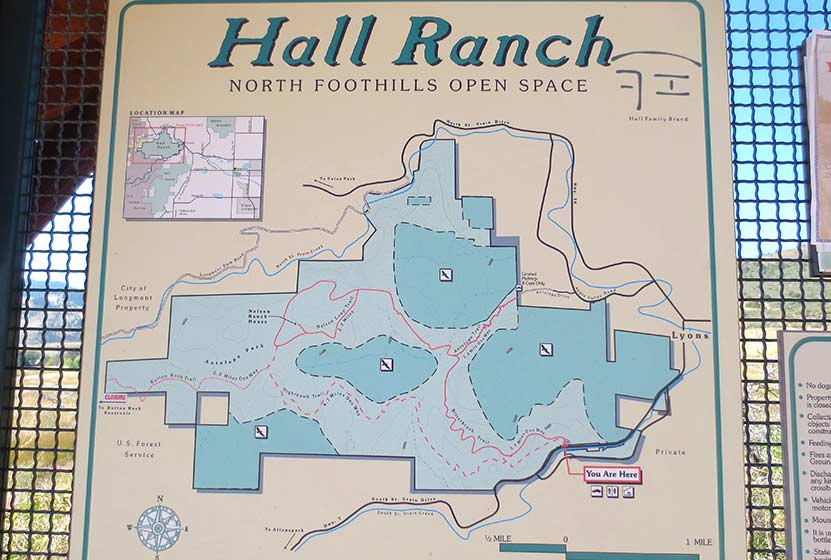
| Hike Trail Map | Click for a Map of Hall Ranch Hiking Trails |
| Denver Drive Time | 1 Hour |
| Driving Directions to Hall Ranch Trailhead | Click for Google Map |
| Town Nearest Hike | Lyons, Colorado |
| Beauty | wildflowers, vistas, grasslands, buttes, pine trees, wildlife |
| Activities | Hiking, photography, picnic tables, mountain biking, trail running |
Directions & Trailhead Information for Hall Ranch Hike
Hall Ranch is situated west of Lyons, Colorado about 16 miles north of Boulder. It's easy to access via the CO 7. There are two trailheads for Hall Ranch. The primary Hall Ranch Trailhead is located off Saint Vrain Drive/CO 7 West, about a mile outside of Lyons. The parking area is located on the North side of the road. This is the best access for most of the hikes and has both restrooms as well as a picnic shelter that can accommodate up to 24 people. The second smaller trailhead is the Antelope Trailhead, located at the end of Antelope Drive just northwest of Lyons. This second trailhead provides access to the Antelope trail, a connector trail described below.
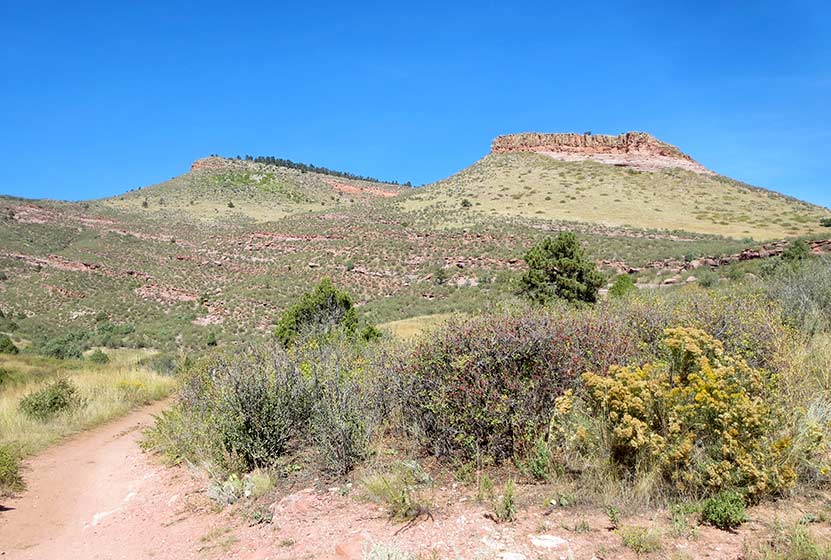
Sandstone Buttes at Hall Ranch
The Hikes: Hall Ranch Hike
There are several options for trails at Hall Ranch:
-
Nighthawk/Bitterbrush Loop - 9.2 Miles RT - +2480' - Moderat
-
Nelson Loop Trail - 2.2 Mile Loop - +299' - Moderate
-
Nighthawk Trail at Hall Ranch - 9 Miles RT - +1282' - Moderate/h3>
-
Bitterbrush Trail - 7.4 RT - +898' - Moderate
-
Antelope Trail - 1 Mile Trail Connector +458' - Moderate
-
Button Rock Trail - 2 Mile Trail Connector +220' - Easy
Probably the most popular is the Nighthawk Trail/Bitterbrush Loop. The loop starts at the west side of the main trailhead and sports a variety of landscapes: expansive meadows, tall buttes, pinion pines, and 180-degree views at its higher elevations. Starting at the main trail, hikers will soon come to an intersection with the Nighthawk trail and Bitterbrush. For this trail profile, we'll take a clockwise approach, following the Nighthawk trail westward. The Nighthawk trail makes a steady climb to where it tops out at approximately 7700' where it offers great views out to Longs Peak and a panorama of Rocky Mountain National Park. Here, hikers will notice an intersection with the Button Rock trail. This 2-mile out-and-back trail is not part of the loop. Staying on the Nighthawk Trail, it will meet up with the Nelson Loop Trail. Hikers can choose to go right or left, both trail segments will link up with the Bitterbrush after approximately 1 mile. Now about 5.5 miles into the hike, hikers will follow the Bitterbrush Trail as it descends for 3.7 miles back down to the main trailhead.
The Nelson Loop can only be accessed by first hiking either the Nighthawk or the Bitterbrush to where they connect up with the Nelson Loop. If you would like to do a lollipop loop hike, we recommend taking the Bitterbrush up to the Nelson Loop, hiking the loop, then returning via the Bitterbrush. This makes for a 9.6-mile hike. The Nelson Loop features the remnants of the old Nelson Homestead just off of the southern segment of the loop.
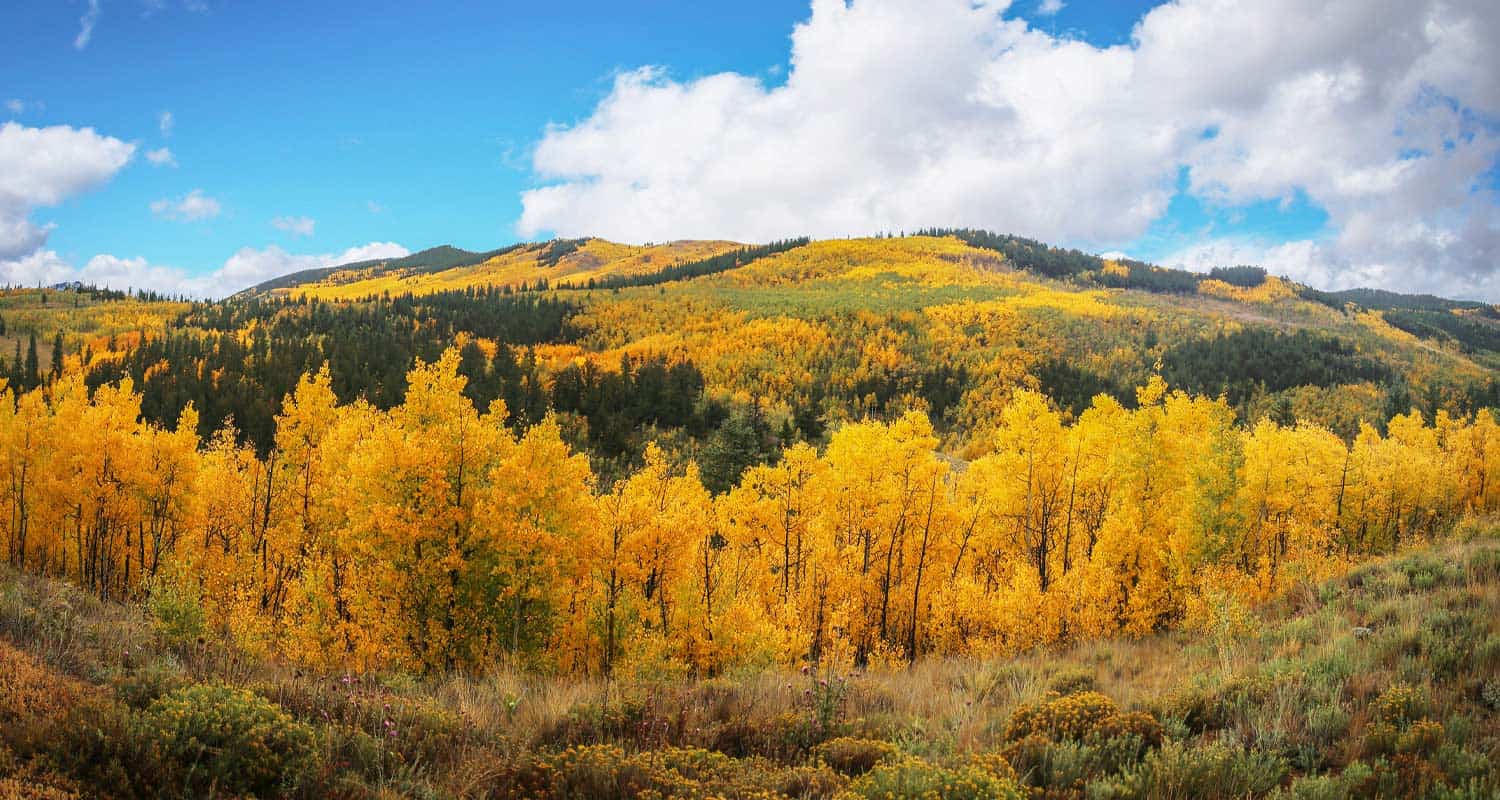
The Nighthawk trail can also be hiked as a 9-mile out-and-back trail. However, we recommend the full loop above because it's almost the same total distance and offers a greater variety of landscape. The Nighthawk Trail is hiker-only, so it makes for a great option if you prefer to avoid horse and mountain bike traffic. This trail is our favorite, offering vast meadows of green in the Spring and early Summer with views out to Mt Meeker and other snowcapped peaks.
The Bitterbrush Trail is a moderate 3.7 trail that begins at the main trailhead or that can be accessed midway by way of the Antelope Trailhead. Out-and-back, it makes for a 7.4-mile trip.
From the Antelope Trailhead, the 1-mile Antelope Trail takes you west to meet up with the Bitterbrush Trail. Gaining approximately 500' in a mile, it can make for a great 2-mile out-and-back trail run and provides some unique views not available on the longer trails.
The Button Rock Trail leads down to the Sleepy Lion Trail at Button Rock Preserve where hikers can pick up a whole series of trails around Ralph Price Reservoir.
Tips & Resources for Hiking Hall Ranch Hike Near Boulder
- Stay the Trail: Follow the designated trails. Keep off the old dirt roads.
- Dogs Prohibited: No pets are allowed at Hall Ranch in order to protect wildlife habitat.
- Trail Map: Hall Ranch Trail Map
- Packing List: Always pack the 10 Essentials. Download our Hiking Guide to get the list and dayhiking packing checklist.
- Colorado Road Conditions: Colorado Road Conditions
- After the Hike: The Stone Cup
Weather
Map & Driving Directions
Click for Driving Directions
Kenosha Pass Hiking Trails
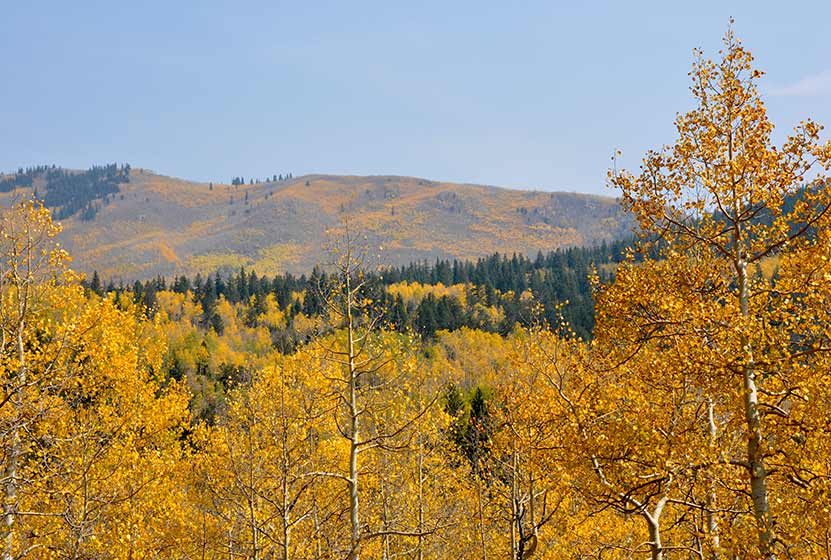
Kenosha Pass is probably the best place to view the changing aspens near Denver. It offers both an East and West trail option with gradual ascents to stunning views. Starting at 10,000' the initial elevation gain on the trails make for easy to moderately strenuous hikes, all depending on how far one decides to travel on these beautiful segments of the Colorado Trail. Vantage points can be accessed about 1/2 mile up both trails offering views down into the high country plains of South Park and out to the Rocky Mountains. Explore the full Kenosha Pass hike profile below for trail map, driving directions, and more tips and details to help you enjoy this Colorado hike.
Trail Snapshot: Kenosha Pass Colorado
| Hike Distance | <1 to 14.4 miles Round Trip |
|---|---|
| Difficulty | Easy to Moderate |
| Duration | Depends on Segment Hiked |
| Trail Type | Out and Back |
| Starting Elevation | 10,000′ |
| Elevation Gain | Approx +400' for shorter hikes |
| Seasons | Year Round |
| Dogs | Allowed On Leash |
| Hike Trail Map | Click for a Map of Kenosha Pass |
| Denver Drive Time | 1 hr 30 min |
| Driving Directions to Kenosha Pass East Parking Area | Click for Google Map |
| Town Nearest Hike | Grant, Colorado |
| Beauty | aspen groves, creek, wildflowers, mountain range views, views of South Park, wildlife: moose |
| Activities | Hiking, mountain biking, horseback riding, photography, snowshoeing, camping |
Parking & Trailhead Information for Kenosha Pass Hike
Kenosha Pass is located about 65 miles southwest of Denver along US 285. From Denver, take US 285 towards Bailey, Colorado. From Bailey, continue driving approximately 19 miles on 285 to the Kenosha Pass Trailhead. The trailhead parking area is located on both East (left when coming from Denver) and West (right side when coming from Denver) of 285. There is additional parking on the East side after crossing a cattle gate. Parking can get tight in the Autumn when the aspens are at their peak, so be considerate of others and the land as you park your vehicle. It's about a 90 minute drive from Denver. Restrooms can be found on both trailheads.
Hiking the Kenosha Pass Trail
Two Hiking Options and Where the Trails Begin
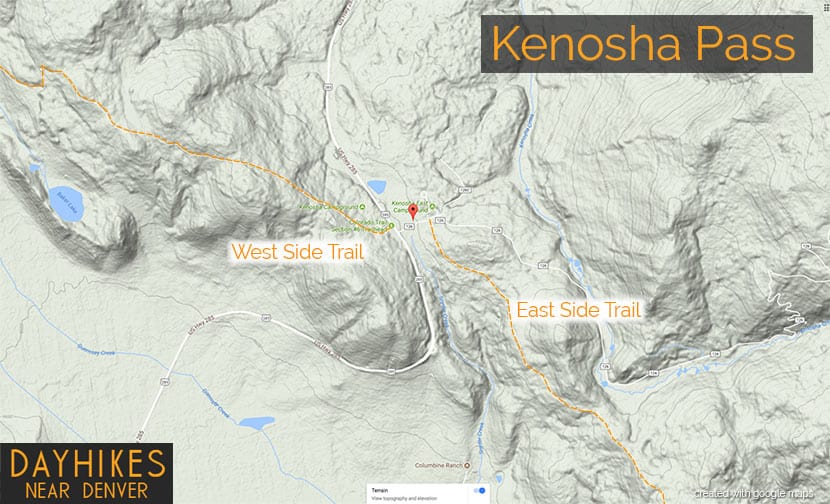
The hiking trails at Kenosha Pass easy to moderate in difficulty and can be done by hikers of all experience levels. At Kenosha Pass, the Colorado Trail, which goes from Denver to Durango, intersects with US Highway 285. This creates an East side trail option and an West side trail option. Both offer incredible views down into the South Park plains of Colorado and out to the often snow-capped peaks of the Mosquito Range.
Hiking the East Side of Kenosha Pass
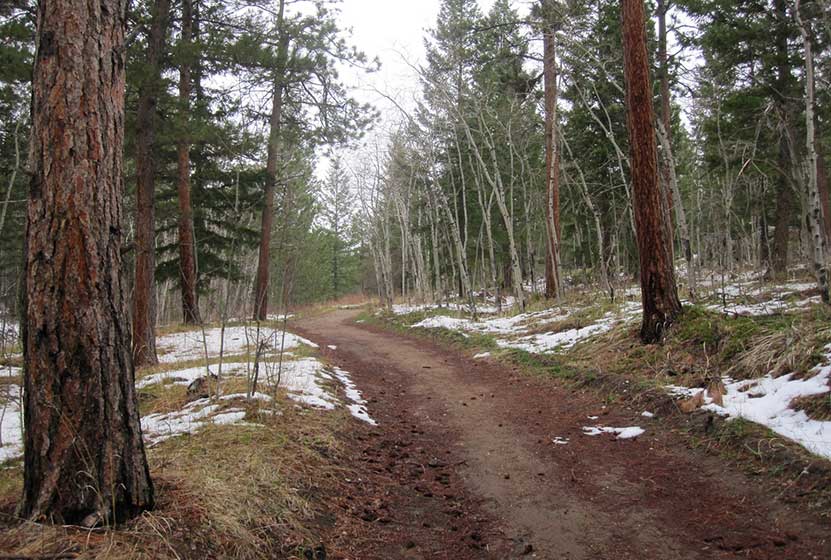
Hikers can pick up the Colorado Trail after crossing the cattle gate (if parked along 285) and hiking along the dirt road that leads to the restrooms that are near the 2nd parking area (after the cattle gate). The Trailhead is located just before the 2nd parking area, and will be located on the right (south). While most visitors park, take a jaunt into the aspens, snap a few photos and leave, the more stunning views await those who venture further south along the trail. The initial trail segment enters with a gradual ascent into the aspens, then at 1/2 a mile into the hike the woods opens up to incredible views into South Park.
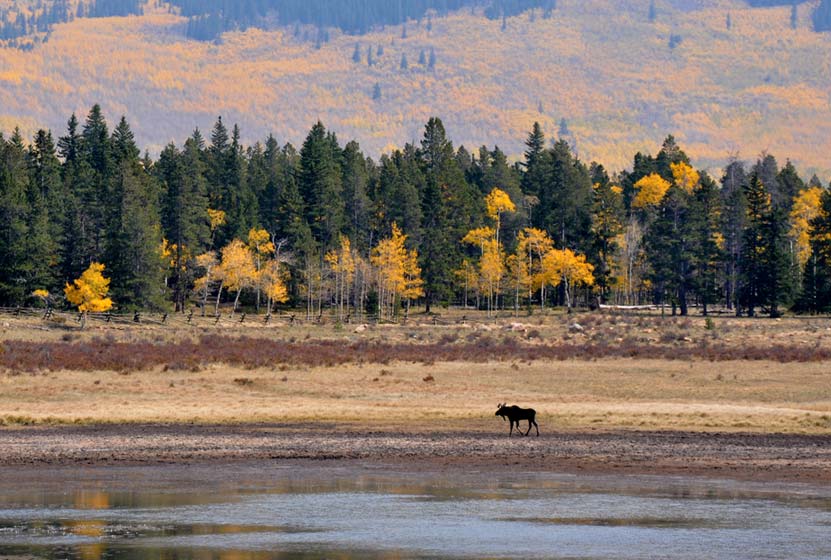
South Park is a high mountains plains area that stretches out mile-upon-mile to its western and norther mountain borders, the Collegiate Peaks and the Mosquito Range of the Rocky Mountains. The climb continues at a gradual pace and hikers will emerge to a second panorama at 1.5 miles. This is a great place to turn-around, making it into a 3 mile out-ant-back hike. Of course, hikers can continue on the trail all the way back into Denver, but that requires a multi-day backpacking trip. As always, keep eyes peeled for changing weather, and pack the 10 Essentials. If you are wondering what should be in your daypack, be sure to download our free Dayhike Hiking and Packing Guide. As for wildlife, moose are often spotted on this side along the lake near the trailhead.
Hiking the West Side of Kenosha Pass
The West Side Trail at Kenosha Pass can be picked up immediately on the West side of 285. The trail enters conifer and aspen forest, making a gentle climb toward the northwest until popping out of the trees to breathtaking views down into South Park and the Mosquito Range. After this viewpoint, the trail travels a short distance uphill, then makes its way down toward Guernsey Creek. The distance from the trailhead to Guernsey Creek is approximately 3 miles, making this a 6 mile out-and-back adventure. Because this is the Colorado Trail, it does continue west, offering multi-day backpacking options that lead all the way to Durango, Colorado.
Tips & Resources for Hiking the Kenosha Pass Trail
- TIP: Bring sunscreen for protection against the sun.
- TIP: One the east side of the highway, there is another parking lot with a lot of bathrooms.
- Trail Map: Map for Trailhead Locations
- Trails Illustrated Kenosha Pass Map: Trails Illustrated Map Link
- Packing List: Always pack the 10 Essentials. Download our Hiking Guide to get the list and dayhiking packing checklist.
- Colorado Road Conditions: Colorado Road Conditions
- Photo: We would like to express our gratitude to Ed Ogle for sharing such an amazing photograph of this hike on Kenosha Pass.
- After the Hike: The Shaggy Sheep
Weather
Map & Driving Directions to Kenosha Pass
Click for Driving Directions
10 Easy Beginner Hikes
Are you looking for hikes close to Denver that are easy for beginners? There are so many options to choose from for those just getting started hiking. We've narrowed down the top 10 easy hikes for those of you who may be either new to hiking or who are hoping to experience some beautiful scenery without a lot of hard work. These are ordered in general order of difficulty so that new hikers can build up their strength as they finish each one on the list. Be sure to download our Free Hiking Guide to help you prepare and pack smart for your dayhikes.
-
Meadow & Forest Loop Trails at Lookout Mountain Nature Center
-
Trading Post Trail at Red Rocks Park
-
Waterton Canyon Hike
-
South Valley Park Trails
-
Fountain Valley Trail at Roxborough State Park
-
Alderfer and Three Sisters Park Hikes
-
Mt. Galbraith Loop via the Cedar Gulch Trail
-
Monarch Lake Loop Hike
-
Raccoon Loop Hike in Golden Gate Canyon State Park
-
Emerald Lake Hike in Rocky Mountain National Park
Distance: 0.6 & 0.8 Mile Loops
Difficulty: Easy
Drive Time from Denver: 30 Minutes
Lookout Mountain Park has two loop easy trails that wind through the ponderosa pines in the foothills above Golden, Colorado. Combine the loops for a longer hike. You'll find this to be a great place to take young children who may be new to hiking. The Nature Center at Lookout Mountain Park is a great place to learn about the environment and wildlife near Denver. If you want to make a day of it, bring a picnic lunch, then take a self-guided tour of the nearby historic Boettcher Mansion. We placed this one as first on the list because it's easiest for families with kids. For adults, you may want to jump straight to number two, the Trading Post Trail at Red Rocks Park.
![]()
Distance: 1.4 Mile Loop
Difficulty: Easy
Drive Time from Denver: 30 Minutes
The Trading Post trail is my #1 recommended hike for those who are getting started with hiking in Denver. It's also my top hike for those who are visiting Denver from out of town. Why? It's just 25 minutes from the city center, is relatively a flat hike, you have red rock formations surrounding you the entire time, and you have more options after the hike. So, if you find that after hiking the loop once, you would like more of a challenge you can: hike it again, hike up into the amphitheater, or try out the nearby Red Rocks Trail.
![]()

Distance: 6.2-Mile trail to the Strontia Springs Dam, or 12.4 Round Trip
Difficulty: Easy to Moderate
Drive Time from Denver: 35 Minutes
Waterton Canyon is a perfect next step in difficulty. The trail is actually a dirt access road that weaves its way through the canyon up to Strontia Springs Reservoir. The reason I put this third on the list is that it gets increasingly steep as you go further into the canyon, but it never gets demanding. You can go as far as you feel like your legs can take you, then turn around when you've seen enough. It's an inviting path that always beckons you to got a bit further to discover what's beyond the next bend. The South Platte River flows on the southern side of the trail and wildlife can be spotted on the mountainsides and skies above. Be sure to pack the sunscreen and bring a hat as Waterton Canyon leaves you exposed to a lot of sun.
![]()
Distance: 0.5 Mile to 3 Miles
Difficulty: Easy
Drive Time from Denver: 30 Minutes
Our fourth recommendation is one of my personal favorites. South Valley Park is hidden behind the hogbacks in Littleton, Colorado. There are 6 trails that make their way through the Red Rock formations in South Valley, giving you a lot of options. All trails are easy to moderate, making South Valley a perfect place for beginner hikers. Don't miss the Coyote Song trail.
![]()
Distance: 2.3-Mile Loop
Difficulty: Easy
Drive Time from Denver: 45 Minutes
The Fountain Valley Trail is so stunning that you might just forget any aches and pains you've earned from your initial hikes. While both Red Rocks Park and South Valley have some great formations, the most spectacular are found here in Roxborough State Park. Roxborough does require either a parks pass or day pass for access, and no dogs are allowed in the park. If you still have some energy in you after hiking through Fountain Valley, you can explore some of the other areas on the south end of the park.
![]()
Distance: 18 Trails: 0.2 to 10+ Miles
Difficulty: Easy
Drive Time from Denver: 40 Minutes
Alderfer and Three Sisters Park has over 10 miles of trails that provide you with a good opportunity to take your game up a notch. There are no real demanding trails, but you'll find some rises enough to push you more than the earlier hikes in this set. With so many intersecting trails and so many beautiful views, Alderfer provides an open field of possibilities. This is a perfect park for those who are in a transitional place with their hiking.
![]()
Distance: 4.9-Mile Lollipop
Difficulty: Moderate
Drive Time from Denver: 25 Minutes
Mt. Galbraith is the first hike in this set with some elevation gain. The first couple segments of this lollipop loop hike outside Golden, Colorado will require more effort, but the views are worth it. Mt. Galbraith has become heavily traveled on the weekends, so the parking area fills up fast. If you find that the lot is full, travel a few miles further down the road to White Ranch Park to hike a loop we've profiled called the sunset loop.
![]()
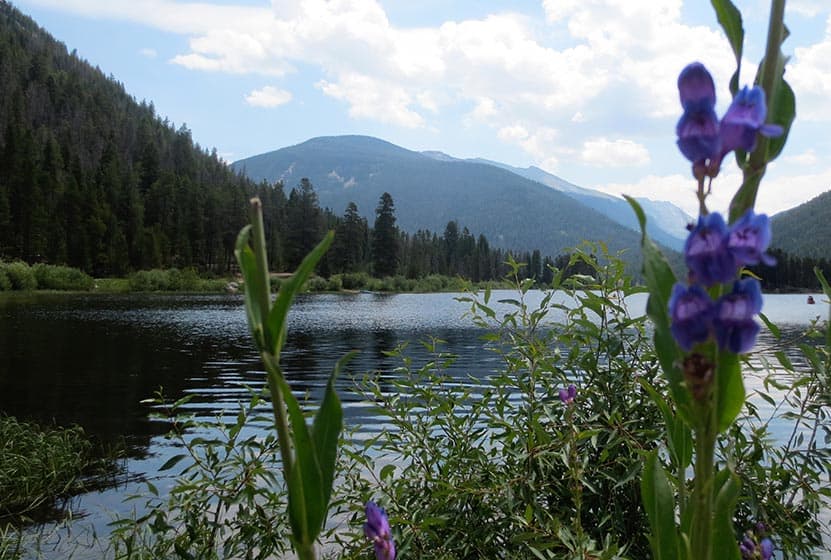
Distance: 4 Miles Round Trip
Difficulty: Easy
Drive Time from Denver: 2 Hours 50 Minutes
The first seven hikes in this easy beginner hikes set are within about 45 minutes of Denver, but Monarch Lake is a good three hour drive. We've included it in this set for those of you who are looking to make a day of it. The drive out to Monarch Lake take you over Berthoud Pass, through Winter Park, and into the western side of the Front Range. The like is relatively level and offers views of the mountains that will take your breath away. The dirt access road can get a bit wearing, so be prepared for the drive in--2WD works just fine most of the year. This is a great family hike, and a makes for a great day exploring from friends who may be visiting from out-of-town.
![]()

Distance: 2.5-Mile Loop
Difficulty: Easy to Moderate
Drive Time from Denver: 1 Hour
The Raccoon Loop will expose you to the heart of Golden Gate Canyon State Park, located about 1 hour from Denver. There are a myriad of hiking trails in the park, and this is a great place to start. There trail rambles through Aspen laden meadows and along mountain brooks. Hikers will encounter a variety of wildflowers, like pink lady slippers, and spot raptors flying above the green and grey faces of the surrounding foothills.
![]()
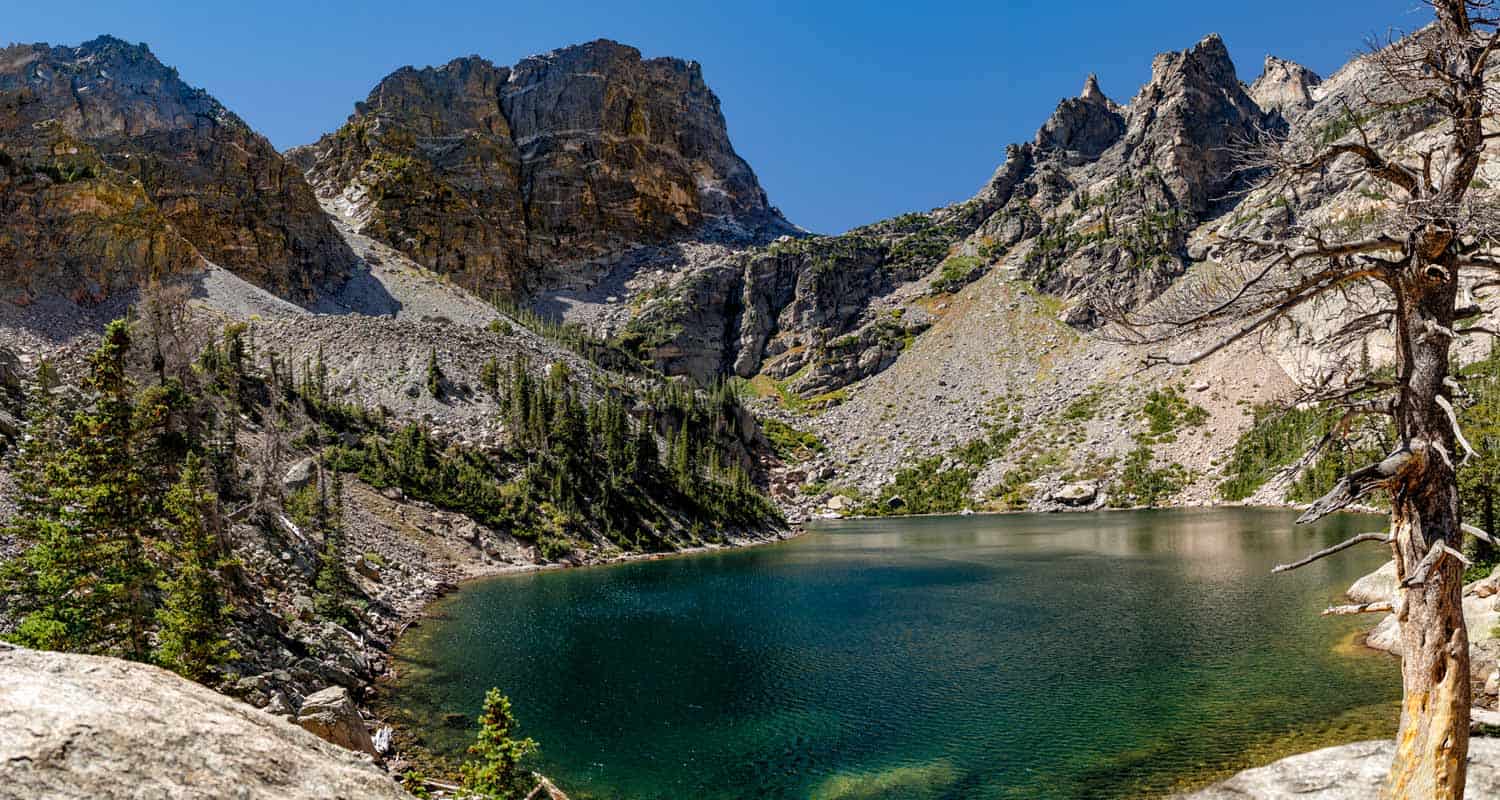
Distance: 3.6 Miles Round Trip
Difficulty: Moderate
Drive Time from Denver: 2 Hours
If you were to take just one hike in Rocky Mountain National park--one that's not too demanding--then the hike up to Emerald Lake is tops. You'll pass cascades and three other sub-alpine lakes along the way to Emerald. The hike turns into a perfect snowshoeing opportunity in the winter months. By the time you've completed the hikes previous in this list, you've likely built both some muscle and stamina. And you may be ready for more. So, be sure to check out our full list of over 50 hikes in Rocky Mountain National Park.
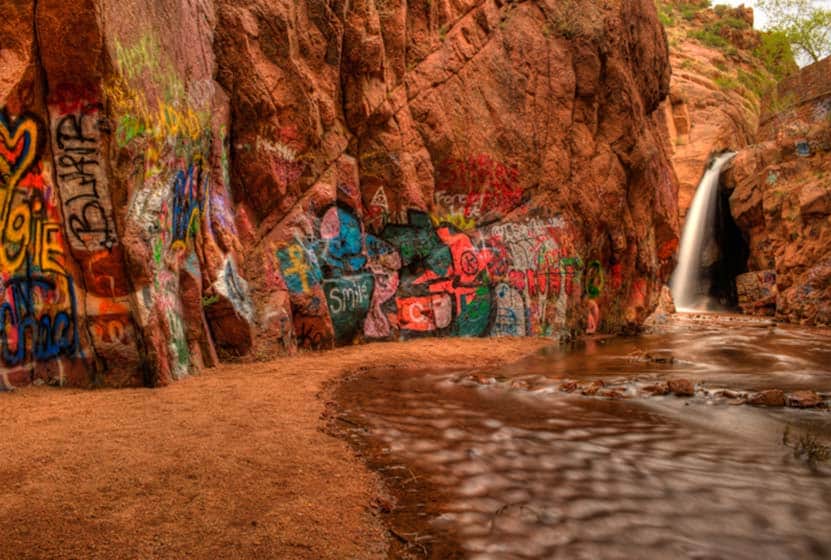
Rainbow Falls Hike in Colorado Springs
The hike to Rainbow Falls is a short easy walk to the waterfall and a historic bridge. The waterfalls is located in Manitou Springs, just west Colorado Springs. The waterfall and bridge had been neglected for decades, but the area is now being restored by local government and local citizens. Explore the full Rainbow Falls hike profile below for trail map, driving directions, and more tips and details to help you enjoy this waterfall hike near Colorado Springs.
Trail Snapshot: Rainbow Falls in Colorado Springs
| Hike Distance | 0.2 mile Round Trip |
|---|---|
| Difficulty | Easy |
| Duration | Less than 1 hr |
| Trail Type | Out and Back |
| Starting Elevation | 6480′ |
| Elevation Gain | Approx +40′ |
| Seasons | Year Round, but best in Spring |
| Dogs | Allowed On Leash |
| Denver Drive Time | 1 hr 20 min |
| Driving Directions to Rainbow Falls Trailhead | Click for Google Map |
| Town Nearest Hike | Manitou Springs, Colorado |
| Beauty | Waterfall, creek |
| Activities | Hiking, photography |
Parking & Trailhead Information for Rainbow Falls
The Rainbow Falls trailhead is located approximately 6 miles from interstate 25, just west of the city of Colorado Springs. From I-25 in Colorado Springs, take the exit for 24/Cimarron. Heading west on 24/Cimarron for 5.5 miles. Turn left onto Serpentine Drive (across from the entrance to Cave of the Winds). The Rainbow Falls Recreation area trailhead is located 0.3 mile up Serpentine Drive, on the right side of a switchback. The trail is found far end of the parking area by the gate.
The Hike: Rainbow Falls Trail in Colorado Springs
It's just a short 1/10th of a mile hike (one-way) to the waterfall. This easy trail takes hikers along the orange and golden rock faces that surround fountain creek, underneath the bridge to the base of the falls. Constructed in 1934, the bridge is on the National Register of Historic Places.
Locals remember when this area before it became clogged with erosion, spoiled by graffiti, and littered with trash. The floods of 2013 brought renewed attention to this hidden area, and a concerned group of citizens put a plan together and pursued grant funding to restore and expand what is now named the Rainbow Falls Recreation Area. In 2016, the state began repair on Rainbow Falls Bridge. After the bridge repair, work on restoring the trail will begin in earnest. The grafitti will be removed, and efforts will be set in place to prevent vandalism of this natural area. Future projects are slated over the next few years, including, the stabilization of the surrounding slopes, construction of picnic overlooks, restoration of habitat and fishing, and connectors to other trails in the Pikes Peak region.
It's important to note that swimming is prohibited and the parking area and Rainbow Falls Recreation area do not allow overnight vehicles or camping. Dogs are allowed on leash, but due to the present state of fountain creek, it is advisable that both pets and their owners refrain from wading into the water; glass and other sharp objects may be littering the creek bed and could cause injury.
Significant progress on the restoration of the Rainbow Falls Recreation area should be completed by the Summer of 2017. More more details, see the Rainbow Falls Recreation Area Master Plan.
Tips & Resources for Hiking to Rainbow Falls in Colorado Springs
- Packing List: Always pack the 10 Essentials. Download our Hiking Guide to get the list and dayhiking packing checklist.
- Colorado Road Conditions: Colorado Road Conditions
- Photo: We would like to express our gratitude to Casey Reynolds for sharing such an amazing photograph of this hike to Rainbow Falls in Colorado Springs.
- After the Hike: The Mate Factor in Manitou Springs
Weather
Map & Driving Directions
Click for Driving Directions
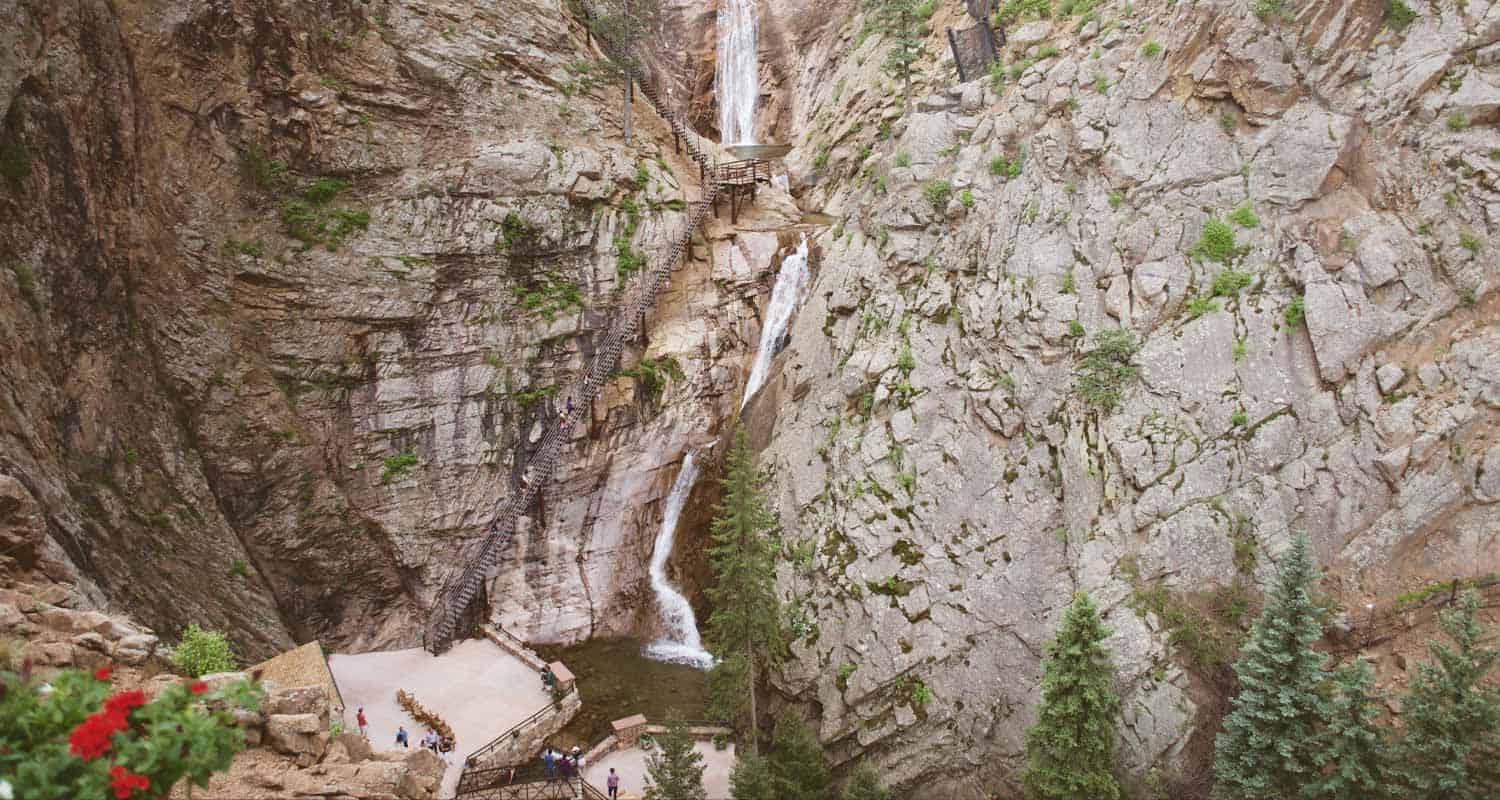
Seven Falls Hike in Colorado Springs
The hike to Seven Falls in Colorado Springs follows a paved canyon trail 0.8 mile to this famous tiered 181-foot waterfall. After severe damage by the floods in 2013, the Broadmoor Resort purchased the property and has made significant improvements, including trail and site repairs, as well as creating an on-site restaurant. As in the past, there is an access fee to this historic Colorado Springs attraction. Explore our full Seven Falls hike profile for 4 different hike options, driving directions, trail map, and tips for making the most of your trip to Seven Falls.
Trail Snapshot: Seven Falls in Colorado Springs
| Hike Distance | 0.4 to 3 miles |
|---|---|
| Difficulty | Easy |
| Duration | Less than 1 hr up to 4 hours |
| Trail Type | Out & Back and Loop Option |
| Seasons | See Site for Dates/Hours of Operation |
| Dogs | Allowed On Leash |
| Hike Trail Map | Click for a Map of Seven Falls Colorado Springs |
| Denver Drive Time | 1 hr 20 min |
| Driving Directions to Seven Falls Parking | Click for Google Map |
| Town Nearest Hike | Colorado Springs, Colorado |
| Beauty | Waterfall, canyon, creek |
| Activities | Hiking, photography, zipline tours |
| Fee | See the Seven Falls Website for current fees |
Parking & Trailhead Information for Seven Falls
The parking and shuttle service for Seven Falls is located at 1045 Lower Gold Camp Road in Colorado Springs. Visitors take the free shuttle from the parking area to the Seven Falls entrance. From here, it’s a 0.8 mile (one-way) hike through the canyon up to Seven Falls. Visitors have the option of taking a tram service to the base of the falls; however, the tram is prioritized for those who have physical limitations that may prevent them from making the journey up to the falls and back. So, on busy days, availability may be limited.
Driving Directions for Seven Falls Parking:
You must take a shuttle from the Norris Penrose building. To access the shuttle from Denver, take I-25 South to exit 141 onto North Cimarron St. Go right/west onto Cimarron St./24 West. At the first intersection, turn left onto 8th Street. After just 0.4 mile on 8th street, turn right onto Lower Gold Camp Road. After 0.4 mile on Lower Gold Camp Road, take a left into the Penrose Equestrian Center. Parking is in the dirt lot to the north of the Norris Penrose building (look for 7 Falls signs). There is no parking at Seven Falls.
Fee:
While parking itself is free of charge for patrons, there is a fee required to visit Seven Falls. For the most up-to-date prices and hours, access the Seven Falls site or contact the Seven Falls Office at 1-855-923-7272.
The Hike: Seven Falls Trail in Colorado Springs
There are three different hike options for visitors to Seven Falls in Colorado Springs.
#1 – Entrance to Base of Seven Falls
Visitors to Seven Falls can walk the 0.8-mile paved trail from the entrance to the base of the falls. The paved, private road winds through South Cheyenne Canyon and under the shadows cast by the Pillars of Hercules, a set of twin rock towers that soar nearly 1000 feet above the floor of the canyon.
At the base of the waterfall, you can choose to take the staircase of 224 steps that provide an opportunity to view the unique segments of this tiered waterfall and give visitors access to the additional three hikes above Seven Falls. At the falls, visitors can also take an elevator to an observation point, which is perhaps the best place to photograph the falls.
A Great Place to Rest and Relax
The path to the base of the falls is wheelchair accessible, and there is a sheltered viewing area (pictured here) and rocking chairs for visitors. If you’re hiking along Cheyenne Creek from the entrance, you’ll also find benches and picnic tables along the trail where you can take a break and soak in the sights and sounds of the canyon.
#2 – Midnight Falls Loop Hike
After climbing the steps to the area above Seven Falls, a short 0.35-mile trail leads south along Cripple Creek to another small waterfall, Midnight Falls. Round trip, this hike takes approximately 30 minutes and is a total distance out-and-back of 0.7 mile.
#3 – Inspiration Point Out-and-Back Hike
Once above the Falls, visitors will follow the Midnight Falls Trail until its first intersection with the Inspiration Point Trail. Taking a left onto the Inspiration Point Trail, it will lead east, then north to the Helen Hunt Jackson Memorial and to the Inspiration Point observation area. Here, hikers can take in views of the Great Plains as they stretch out to the East and of views of the city of Colorado Springs below. The hike to Inspiration Point is about 1.5-mile round-trip and takes approximately one hour to complete from the top of the falls.
Adventure Report – June 2023
In June of 2023, my teenage daughters and I hiked the winding canyon road up to Seven Falls, climbed the steep set of stairs to the top, and explored the trails above the falls. We enjoyed a wonderful lunch at 1858 restaurant, explored the gift shops, and made some memories.
A front had moved in, bringing rain to Colorado Springs, but it didn’t ruin our adventure. In fact, the clouds and mist added to the enchantment of Cheyenne Canyon. I was impressed by the established trees lining the creek: thick Ponderosa Pines and tall Douglas Fir. The White Fir trees were especially beautiful in the rain. When wet, their needles turn a glossy white and shimmer when they catch the light.
Along the road, toward the top, there’s a food truck and picnic pavilion. At this point, what stood out most to me was the care taken to preserve and maintain the property. From the lawns to the flowers, and paint to the lighting, the grounds were immaculate. We experienced the same thing at the Cog Railway in Manitou Springs. I love places with historical significance, and I’m always encouraged to see them so well cared for.
Lunch at 1858 Restaurant
The walls of 1858 are decorated with Western artwork and memorabilia documenting the history of Seven Falls and Cheyenne Canyon. Compared to a lunch down in Colorado Springs, you’ll pay a bit of a premium to eat here next to the falls. However, like every establishment managed by the Broadmoor, you’ll get fantastic food and top-notch service. Our girls both eat gluten-free, and 1858 provided a GF bun for their burgers–and the fries were perfect.
Reservations are recommended for dinner, and you’ll want allow about an hour before your reservation for taking the shuttle and walking the road up to the restaurant. More info is available at: https://www.sevenfalls.com/dine/restaurant-1858/
After lunch, we climbed the 224 steps to the top of the falls. Along the way, we enjoyed the more up-close experience of the upper leaps that make up the seven segments of the waterfall.
The trails above the falls were well-marked, and it was easy to find our way to Midnight Falls and then over to Inspiration Point. Midnight Falls is a quaint waterfall, and was worth the short hike through the forest.
While the girls took the steps back down to the gift shop, I hiked the trail up to Inspiration Point. I actually found some of the lookouts along the way more enjoyable than the final destination. Distant lightning and some loud thunder were moving in from the west, so I high-tailed it back down to the base of the Falls.
Though it was a misty and foggy day, we were all smiles. The hike through the canyon to the falls, our lunch, and our time being together as a family was another chance to make memories and enjoy this unique site in our beautiful state of Colorado.
Tips & Resources for Hiking to Seven Falls in Colorado Springs
- Expect Crowds in Summer and on Weekends: Because Seven Falls is a popular tourist destination, it can become quite crowded on weekends and during the vacation season of Mid-May through Labor Day Weekend.
- Operating Hours Vary: The open and close times, as well as shuttle service, varies during different seasons. Inclement weather can also close Seven Falls, so be sure to call ahead for hours 1-855-923-7272.
- Trail Map for Seven Falls in Colorado Springs: Trail Map Link
- Packing List: Always pack the 10 Essentials. Download our Hiking Guide to get the list and dayhiking packing checklist.
- Colorado Road Conditions: Colorado Road Conditions
- Photo: We would like to express our gratitude to Tim Caynes and John Folwer for sharing their photographs of Seven Falls in Colorado Springs.
- After the Hike: Restaurant 1858 at Seven Falls: The lunch menu is more than what you might pay at a similar place in town, but quality of food and beautiful location make it worth it. Dinner menu is more expensive. No dogs, except service animals, allowed at the restaurant.
Weather
Map & Driving Directions
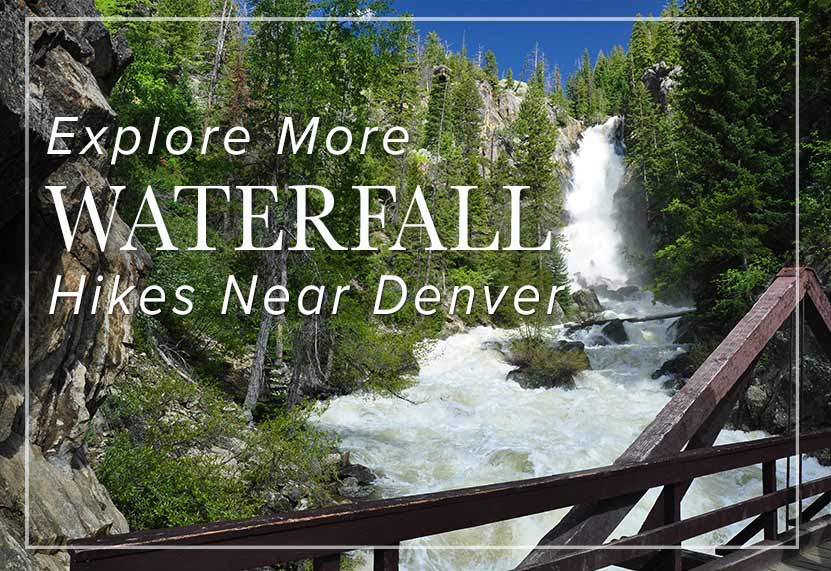
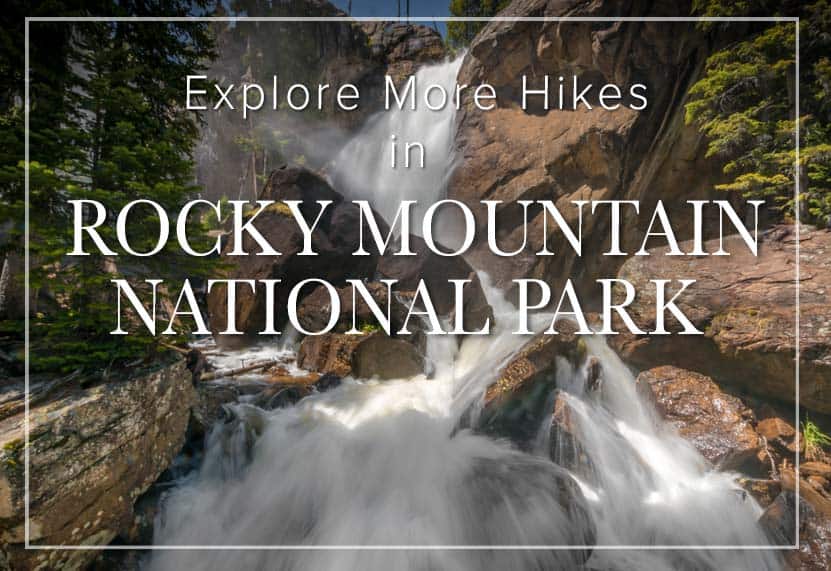
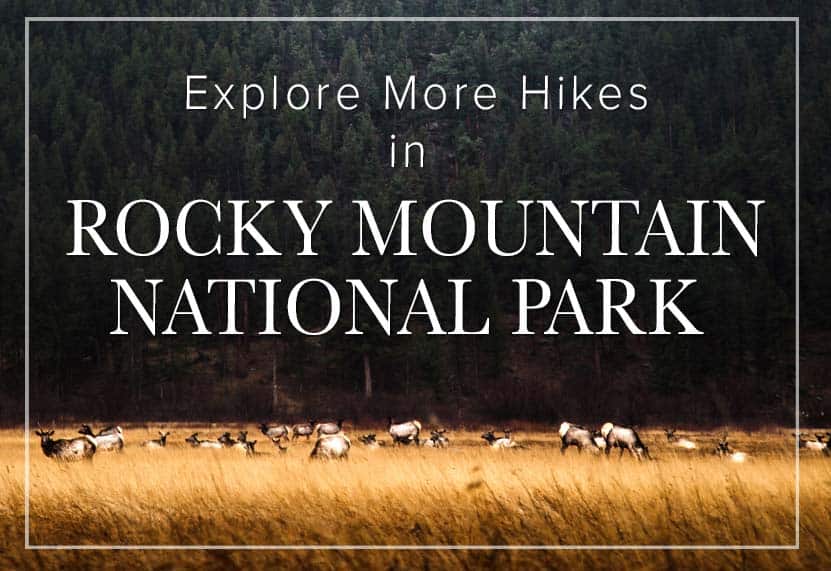
Looking for more waterfalls near Denver? Explore our more than 50 Colorado Waterfall Hikes, our favorite Waterfall Hikes in Rocky Mountain National Park, or 7 Waterfalls within One Hour of Denver.
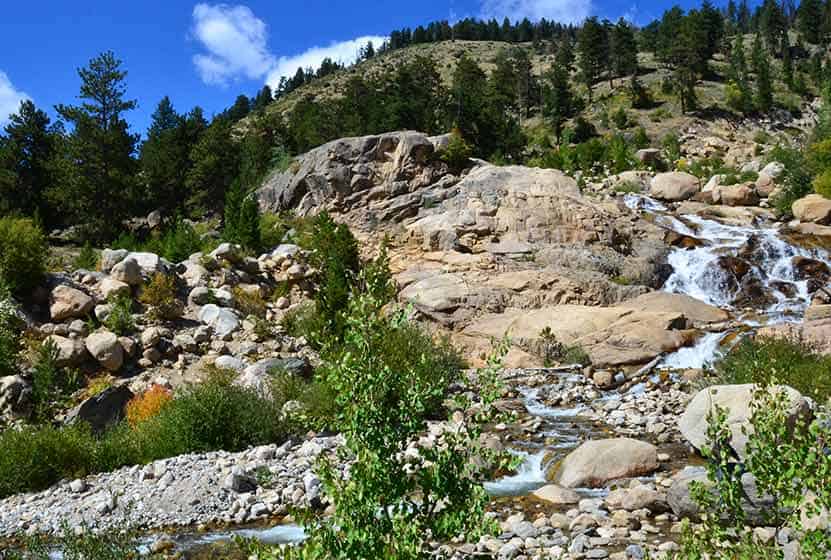
Horseshoe Falls in Rocky Mountain National Park
Horseshoe Falls in Rocky Mountain National Park is a favorite family hike near Estes Park, Colorado. It's a short and easy hike from the Alluvial Fan Trailhead, but the falls can also be viewed from the roadside. It's an extensive cascade waterfall, named for the way it bends its course through the rocky hillside. Explore the full Horseshoe Falls hike profile below for trail map, driving directions, and more tips and details to help you enjoy this adventure in Rocky Mountain National Park.
Note: Rocky Mountain National Park now requires timed entry permits from May 27th through October 10th. See the RMNP permits page for more information.
Trail Snapshot: Horseshoe Falls in Rocky Mountain National Park
| Hike Distance | 0.4 mile Round Trip |
|---|---|
| Difficulty | Easy |
| Duration | Approx less than 1 hr Round Trip |
| Trail Type | Out and Back |
| Starting Elevation | 8550' |
| Elevation Gain | Approx. +130' |
| Seasons | Spring through Fall, Winter Snowshoeing |
| Dogs | Prohibited in RMNP |
| Hike Trail Map | Click for a Map of Horseshoe Falls RMNP |
| Denver Drive Time | 1 hr 40 min |
| Driving Directions to West Alluvial Fan Trailhead | Click for Google Map |
| Driving Directions to East Alluvial Fan Trailhead | Click for Google Map |
| Town Nearest Hike | Estes Park, Colorado |
| Beauty | Waterfall, mountain views, meadows, river, wildlife: elk, big horn sheep, Abert's squirrel, deer, moose, bear; wildflowers |
| Activities | Picnicking, hiking trails, snowshoeing, horseback riding, backcountry camping (with a permit), photography |
| Fee | Park Pass Required |
Parking & Trailhead Information for Horseshoe Falls
Horseshoe Falls can be accessed just outside Estes Park, Colorado by taking Fall River Road to Old Fall River Road. The East Alluvial Fan Trailhead is approximately 1/2 mile up Old Fall River Road, and the West Alluvial Fan Trailhead is just about 1/4 of a mile further. Because Horseshoe Falls is popular destination in RMNP, the parking fills up fast. There is an additional parking area just before reaching the East Alluvial Fan Trailhead, see this link for driving directions and map.
The Hike: Horseshoe Falls Trail in RMNP
This short hike to Horseshoe Falls got even shorter because of the 2013 flooding in the Estes Park and Rocky Mountain National Park area. As of this writing (6/30/2016) both the East and West Alluvial Fan Trailhead parking areas have reopened. However, the trails are still buried under rock and debris, and the bridge--which used to be a great viewing platform for Horseshoe Falls--has not been replaced. This doesn't mean a short hike up to the base of the falls is impossible, but it does require a some care in navigating the terrain. The official RMNP communications ask hikers first consult posted signs or speak with a park ranger before making the trek. As with all off-trail hiking along rivers, it's important to exercise caution near fast moving water and on the surrounding slippery surfaces of rocks and logs.
When the trail is repaired (assuming that it will use the same route), the Alluvial Fan Trail can be hiked from either of the two lots to the bridge viewing area, which is just under 1/4 mile one-way.
Horseshoe Falls and the larger Alluvial Fan area have an interesting history. Before the establishment of Rocky Mountain National Park, a twenty-six foot high dam was built to enlarge Lawn Lake, which is located about 6.5 miles north of Horseshoe Falls and a major source of the Roaring River. On a perfectly normal day in the Summer of 1982, an almost 100 foot stretch of the dam collapsed and sent a 30-foot high wall of water careening down the valley. At Horseshoe Park, much of the wash settled into what is now known as the 42 acre Alluvial Fan, comprised of sorted gravel, boulders--some over 400 tons--and streams of sand. Three people lost their lives in the flood, one camper, and two folks who had ventured out to capture photos of the event. The river surged all the way into the downtown of Estes Park, carrying away trees and cars, and breaking through another dam before being contained by Lake Estes.
Tips & Resources for Hiking to Horseshoe Falls in RMNP
- For Closure Updates: See the Rocky Mountain National Park Flood Impact and Closure page for updates on the conditions of this trail.
- TIP: The Alluvial Fan and larger Horseshoe Park area are popular spots for viewing Elk.
- Get there early: Parking may be somewhat limited as with many hikes in RMNP area and can get full even early in the morning.
- Trail Map for Fall River Area: Trail Map Link
- Packing List: Always pack the 10 Essentials. Download our Hiking Guide to get list and dayhiking packing checklist.
- Colorado Road Conditions: Colorado Road Conditions
- Photo: We would like to express our gratitude to Joan Morris Holzer for sharing such an amazing photograph of this hike to Horseshoe Falls in RMNP.
- After the Hike: Mountain Home Café
Weather
Map & Driving Directions
Click for Driving Directions
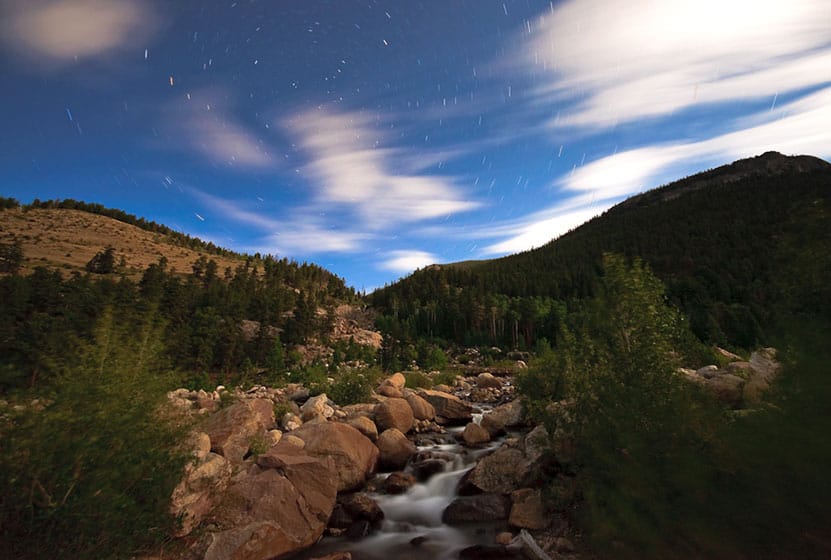
Chasm Falls in Rocky Mountain National Park
Chasm Falls in Rocky Mountain National Park bursts through a chasm in Fall River where the rock funnels its waters into a narrow gorge. It's one of the more accessible waterfalls in RMNP, located about 100 yards off of Old Fall River Road. The only drawback is that parking fills fast. However, there are several parking and hike options that we detail in this trail profile. Explore the full Chasm Falls hike profile below for trail map, driving directions, and more tips and details to help you enjoy this adventure in Rocky Mountain National Park.
Note: Rocky Mountain National Park now requires timed entry permits from May 27th through October 10th. See the RMNP permits page for more information.
Trail Snapshot: Chasm Falls in Rocky Mountain National Park
| Hike Distance | 0.1 mile, 2.8, or 4.8 miles (depending on parking area) |
|---|---|
| Difficulty | Easy |
| Duration | 20 minutes to approx 2.5 hrs Round-Trip |
| Trail Type | Out and Back |
| Starting Elevation | 9065' at the pulloff |
| Elevation Gain | Negligible (but more, if hiking up Old Fall River Road) |
| Seasons | Spring through Fall, Winter Snowshoeing |
| Dogs | Prohibited in RMNP but Allowed on certain days on Leash along Old Fall River Road (see details below) |
| Hike Trail Map | Click for a Map of Chasm Falls RMNP |
| Denver Drive Time | 1 hr 40 min |
| Driving Directions to a roadside pulloff area at Chasm Falls Trailhead | Click for Google Map |
| Driving Directions to EndoValley Parking Area | Click for Google Map |
| Driving Directions to West Alluvial Fan Parking Area | Click for Google Map |
| Town Nearest Hike | Estes Park, Colorado |
| Beauty | Waterfall, mountain views, meadows, river, wildlife: elk, big horn sheep, Abert's squirrel, deer, moose, bear; wildflowers |
| Activities | Picnicking, hiking trails, snowshoeing, horseback riding, backcountry camping (with a permit), photography |
| Fee | Park Pass Required |
Parking & Trailhead Information for Chasm Falls
Parking is tricky for Chasm Falls. Depending on where you are able to park, the hike will be a 0.1 mile, 2.8 mile, or 4.8 mile round-trip hike. It's also important to know that Old Fall River Road is closed during the winter months from Nov 30th until the end of March. However, the dirt road gets a lot of traffic and needs a lot of maintenance; so, there may be Spring and Summer closures for repairs. For example, Fall River Road will not open to vehicles in 2016 until early July. We recommend that you visit the Rocky Mountain National Park Road Status page to plan your trip to Chasm Falls and your drive up Old Fall River Road. Below, you'll find the three different parking options
Parking Options for Chasm Falls, Rocky Mountain National Park
#1 - Pulloff Near Chasm Falls - 0.1 Mile Jaunt - Driving Directions
#2 - Endovalley Picnic Area Parking - 2.8 Mile Round Trip Hike - Driving Directions
#3 - West Alluvial Fan Parking Area - 4.8 Mile Round Trip Hike - Driving Directions
During the busy summer months, all of these parking areas fill fast. Dogs are typically not allowed in RMNP, but on certain days, they are allowed along Old Fall River Road as long as they are leashed. See the Old Fall River Road status page for days when dogs are allowed. The scenic drive up Old Fall River Road is half the adventure--but not for the faint of heart. It's a steep dirt road with no guardrails and lots of switchbacks. When the road is open, park visitors can drive it all the way up to the Alpine Visitor Center, and take Trail Ridge Road back down into Estes Park, or take Trail Ridge Road over to the west side of the park in Grand Lake, Colorado.
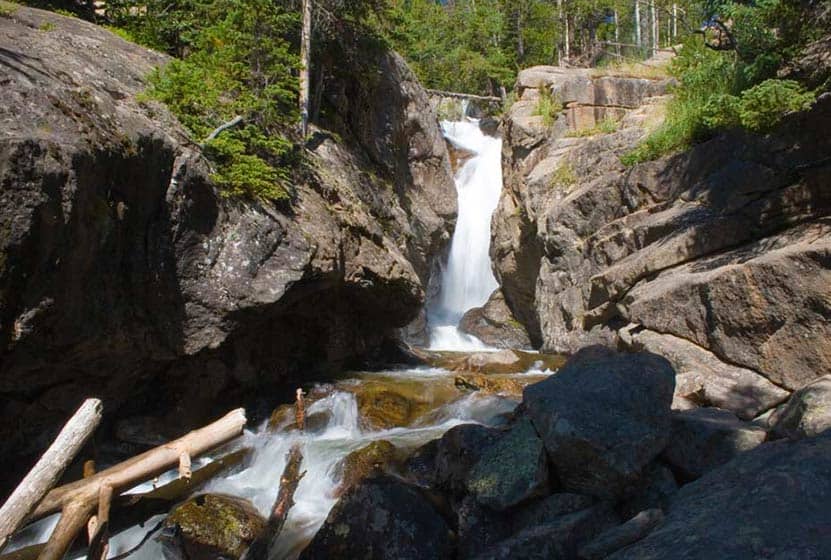
The Hike: Chasm Falls Trail in RMNP
The hike from the pulloff along Old Fall River Road is well-marked with signs. The short trail of approx. 100 yards leads down stone steps and a steep dirt trail. The bottom of the trail opens to a viewing platform. Like the parking areas, the platform can get quite crowded during the busy summer months.
If hiking up Old Fall River Road from either Endovalley or West Alluvial Fall parking areas, be sure to be aware of vehicles as they make their way up and down the road. This this can be a great winter hike or snowshoe trip during the winter. Usually this means starting from the West Alluvial Fan parking area.
Tips & Resources for Hiking to Chasm Falls in RMNP
- Prepare: Bring water and high-energy food.
- Winter Road Closure: The road is closed to cars during winter. You may opt to plan on a longer hike during this season - starting from the West Alluvial parking area.
- Get there early: Parking may be limited at most of the trailheads in RMNP during the summer months. Go early to get a good spot. By early, we mean before 7:30 AM.
- Trail Map of Fall River Area: Trail Map Link
- Packing List: Always pack the 10 Essentials. Download our Hiking Guide to get list and dayhiking packing checklist.
- Colorado Road Conditions: Colorado Road Conditions
- Photo: We would like to express our gratitude to Tim Vo for sharing such an amazing photograph of this hike to Chasm Falls in RMNP.
- After the Hike: Mountain Home Café
Weather
Map & Driving Directions
Click for Driving Directions to Pulloff Near Chasm Falls